Quantcast
Channel: THE CHEF and HER KITCHEN
Viewing all 520 articles
Browse latest View live

Pulusu Annam | Puli Sadam | Tamarind Rice with Left over Rice

$
0
0
pulusu annam
Pulihora or Puliyogre is one of the most famous and common rice varieties of South India and every south Indian state has its own version to prepare it.I have already posted Andhra style Chintapandu Pulihora and an easy version of Karnataka style Puliyogre before and today I am posting a version of Pulihora which can be prepared with left over rice or with freshly cooked rice.The addition of onions makes this rice quite distinct when compared to the traditional Pulihora. Its very rare to have left over rice at my place as mine is a nuclear family and I usually end up making exact quantity of rice needed for my family. But if you have left over rice you can prepare this delicious 'Pulusu annam' or 'Talimpu annam/Phodnicha Bhaat' and both the rice varieties tastes delicious and it is the best way to consume the rice.

Also check out other Pulihora Recipes in my blog:
puli sadam

Pulusu Annam | Tamarind Rice with left over Rice Recipe:
Serves 2
Prep time:10 mins | Cooking time:40 mins | Total time: 50 mins
Cuisine: South Indian | Category: Lunch-Rice Varieties

Ingredients:
1 cup Sona masura rice(or equivalent) or left over rice
1 big lemon size Tamarind
2 medium Onions or 15-20 Shallots, roughly chopped
4-5 Garlic cloves,chopped(optional)
3-4 light colored(less spice) Green chillies,slit
1/2 tsp Mustard seeds
2 tbsp Chana dal
1 tbsp Urad dal
3-4 dry Red chillies
1 tsp Turmeric powder
a pinch of Asafoetida
a sprig of Curry leaves
2-3 tbsp Sesame Oil
Salt to taste

Method:
  • Wash the rice and add 2 cups of water and soak it for 15-20 mins.Pressure cook the rice or cook it in electric rice cooker or how ever you usually do.
  • Once the rice is done,cool it completely by spreading it over wide plate smear with 1 tsp of oil and 1/2 tsp turmeric powder.If you are using left over rice,add 1 tsp sesame oil and turmeric powder to it and  run your hands in the rice to keep the granules separate.I added turmeric to the tamarind mixture instead of rice here,you can follow either ways.
  • Soak tamarind in 1/2 cup of water for 10-15 mins or microwave the tamarind mixture for 1 min.Microwave method is quite quick when u have lack of time.After it is cooled down remove the pulp and keep it ready.
  • In a kadai heat oil and crackle the mustard seeds.Add chana dal,urad dal,red chillies,chopped garlic and fry for a couple of minutes until done.
  • Add curry leaves,green chillies,asafoetida and chopped onions and fry until they turn translucent.
  • Add tamarind pulp mixture and turmeric powder and mix until the mixture thickens completely for at least 5-6 mins.Add enough salt to it and mix.
  • Now remove it from the stove and let it cool a bit and reserve some mixture and pour the remaining mixture over the cooled rice and mix properly until everything is well blended.Now check the taste of it and add more tamarind mixture or salt according to your taste.It should taste sour when you taste it as the sourness will reduce and blend well along with the time it sits.
  • Let it sit for 5-10 mins before serving.
Serve it at room temperature.
                                         pulusu annam
Notes:
  1. Use rice varieties like sona masuri, ponni, jeeraga samba for these kind of rice varieties,I do not suggest basmati rice.
  2. Always make it bit tangy so that it will taste nice once it settles down.
  3. You can add a tsp of roasted cumin and fenugreek powder to the boiling tamarind mixture for more fragrant version. If you have time you add it otherwise you can skip it. 
  4. If you like you can even add roasted sesame powder at the end and give a nice mix to the rice.
  5. Sesame oil works best for this rice, if you do not have use regular cooking oil.
puli sadam


Sev Puri Recipe | How to make Sev puri | Mumbai Sev Puri Recipe

$
0
0
sevpuri

Sev Puri is one of the popular chaats which evolved from the streets of Mumbai.You will find the bhel waala in every corner of the streets here in Mumbai, though I usually don't venture out eating at the road side stalls unless it is a popular stall.Though we get Sev puri everywhere in India,Mumbai style sev puri is bit different when compared to the other versions.What makes Mumbai style Sev Puri different is the addition of Garlic chutney and lemon juice which is quite unique to Mumbai style Sev Puri.
sevpuri

While I love all kind of chaat varieties, my all time favorite is Golgappa/Pani puri and Bangarpet Pani Puri.Apart from those pani puri varieties, I love masala puri, sev puri, papdi chat and dahi puri. Back home apart from my dad, we are all chaat lovers .While we eat chaats as a meal but my dad always prefers to eat it as a evening snack and so is the case with my husband now.
             sevpuri

If you love chaats, check out few other chaat recipes here in my blog:
sevpuri

Sev Puri Recipe : 
Serves 2 | Author: Prathibha
Preparation time:5 mins | Cooking time:15 mins | Total time: 20 mins
Cuisine: North Indian | Category: Chaats

Ingredients:
14-16 flat Puris/Papdis(homemade/readymade)
2 Potatoes,boiled,peeled and chopped or mashed roughly
1 Onion,finely chopped
1/2 Lemon
1/4 cup chopped fresh Coriander
1/3 cup fine Sev
1/4 cup Kharjur-Imli chutney
1/4 cup Green chutney
2 tbsp Lehsun chutney(Garlic chutney),recipe below
1 tbsp roasted Cumin powder
1 tsp Red chili powder
1 tsp Chaat masala
Salt to taste

for Garlic Chutney:
1 whole Garlic pod
2 tbsp Red chili powder
juice of 1/2 Lemon
Salt to taste

Method:
to prepare Garlic(Lehsun) chutney:
Separate the garlic cloves and peel the skin and blend with red chili powder,lemon juice,salt and 2-3 tbsp of water to a smooth paste.You can refrigerate this chutney and use it upto 15-20 days.

to prepare Sev Puri:
  • Pressure cook potatoes for 3 whistles.Add enough salt to potatoes while cooking them.Peel the potatoes and chop them into fine pieces.
  • Arrange the flat puris/papdis in 2 plates,7-8 each.
  • Fill them with 2 tsp boiled and chopped potatoes and followed by 1/2 tsp chopped onion in each puri.
  • Top it with little bit(say1/4 tsp) of garlic chutney on all the puris/papdis.
  • Now top it with a generous drizzle of kharjur-imli chutney and green chutney.
  • Sprinkle a fat pinch of roasted cumin powder,red chili powder,chaat masala and salt.
  • Squeeze few drops of lemon juice on all the puris.
  • Top it with sev generously and garnish with chopped coriander leaves.
Serve it immediately.
Do not keep it for long as it will become soggy,so prepare this just before serving,Keep all the ingredients ready before you serve this.
sevpuri

 Notes:
  • If you want to prepare Papdis at home you can mix 1 cup of maida and 1 cup of atta and add 2 tsp of oil to it and rub with the finger tips.Add enough water to make a stiff dough and rest for some time.Roll into small discs of 1.5 inch diameter and prick them 2 to 3 times with a fork and deep fry on low flame until golden brown,repeat the process and prepare all the papdis.
  • There are no specific measurements for this recipe.All the ingredients are adjusted according to your taste buds.
  • You can make more number of plated increasing the quantities accordingly,there are no measurements.
  • You can use chopped tomatoes to the recipe if you wish.
  • You can add nicely beaten curd(mixed with sugar) on the puris before you add the chutneys to make it Dahi Sev Puri.

Indian Style Pasta Recipe | Masala Pasta Recipe

$
0
0
indian style pasta
When it comes to pasta I usually do not prefer ordering pasta if we go to any Italian restaurant, the reasons simply are that I find the pasta is too bland for y taste buds and also it is loaded with lots of cheese.Instead I would happily go for paper thin Pizzas though they are loaded with cheese. 
indian style masala pasta
Pastas are perfect for weekend lunch or dinner and I usually make it for dinner as I find it easy to cook.As TH prefers mostly Pesto sauces with pasta or a simple one rather than the tomato or the white sauce, I usually end up preparing either Basil Pesto Pasta or Spinach Pesto Pasta or simple Aglio Olio or Sundried Tomato Pesto Pasta or  Red Bell Pepper Sauce Pasta.But when parents or in-laws come to visit us and if we plan for pasta for dinner, I usually end up preparing this Indian style pasta for them to suit their taste buds as I am sure that they would not prefer other kind of pastas which I usually prepare.I must say that this is a fusion recipe and definitely would suit any Indian taste buds.
indian style masala pasta
Check out other Pasta Recipes in my blog:
indian style masala pasta

Indian style Pasta Recipe | Masala Pasta Recipe:
Serves 2
Prep time:25 mins | Cooking time:20 mins | Total time:45 mins
Cuisine:Indo-Italian | Category: Pasta - Main Course

Ingredients:
2 cups Penne Pasta(or any other shape like fusili,sphagetti)
1 Onion,finely chopped
1 large Tomato,blanched and pureed
1 Carrot,finely chopped
1 Capsicum,finely chopped
3-4 Babycorns,finely chopped(optional)
3-4 Garlic pods,finely chopped
2 tsp Tomato Sauce
1/4 tsp Garam masala
1 tsp Red chili powder
1/4 tsp Black Pepper powder
1 tsp Mixed Herbs or Oregano
2 tbsp chopped Coriander
2-3 tbsp Olive Oil
Salt to taste

Method:
to cook pasta:
Cook according to the instruction of your package or follow this procedure:
  • Bring water to boil in a big pot (filled to its half) and add salt,1 tsp olive oil and pasta and cook over medium flame for 10-12 mins until al dente(cooked and tender to teeth).You can cook it further for 2-3 mins more to get soft pasta,but definitely do not make it soggy.

  • Drain and reserve 1/2 cup of water for later usage.you can even give a cold bath to the pasta by running it under fresh tap water which helps in keeping the pasta separate.
to prepare Masala Pasta:
  • Heat olive oil in a wide bottomed pan and fry sliced garlic until slight brown and then add chopped onions and fry until they are pink and soft.
  • Add finely chopped carrots and baby corns and fry well for 5-6 mins and then add finely chopped capsicum and fry for a minute.
  • Now add pureed tomato,tomato sauce,garam masala powder,red chili powder and mix well and fry until the oil separates.I have not added tomato puree as I was not having tomatoes at home at that moment.
  • Add 4-5 tbsp of reserved pasta liquid if required add more to get a medium sauce consistency.
  • Add cooked pasta and mix well until all the pasta is covered with the sauce and is warm.Now add black pepper powder,Italian herbs,chopped coriander,salt(remember we added salt while making pasta as well,so add accordingly)and mix well.
  • Dish it out to the serving platter and garnish with coriander.
Serve it hot or warm with Tomato sauce and Lime Soda or drink of your choice.

masala pasta

Notes:
  1. You can replace penne pasta with any of the pasta like spiral, fusili, spaghetti, macaroni , farfelle or any other pasta of your choice.
  2. If you want it more spicy add chopped green chilli while adding onions.
  3. If you are preparing it for kids adjust the spicyness accordingly.
  4. If you want to skip tomato sauce ,add 1/2 tsp of sugar to the tomato puree to balance the flavors in pasta.
  5. You can add colored bell peppers, blanched broccoli, thinly sliced mushrooms to the pasta.
  6. You can make it a bit more Desi version by adding cumin seeds and curry leaves in the tempering and also turmeric powder along with the other masala but somehow I don't like the idea of making the pasta very south Indian way.
indian style pasta

Instant Wheat Flour Dosa Recipe | Instant Dosa Recipes

$
0
0
wheat flour dosa
Instant dosas always come to rescue when we do not plan anything for breakfast. One of the most common instant version dosas is Rava Dosa, apart from Rava dosa we do prepare various instant variety dosas like Rice flour Dosa,Ragi Dosa,Wheat flour Dosa and Oats Dosa. The good thing about these dosas are that they are thin and crisp and is best eaten when hot.It is not ideal to keep these dosas for long as they turn soggy and become slightly sticky.
wheat flour dosa
Though the process of preparation of these dosas is very simple, one needs a skill set to prepare perfect thin and crisp dosas, the key for the perfect and crisp lacy dosas lies in the consistency of batter and also the tawa we use to prepare dosas.It is always preferable to use flat tawas(iron or non-stick tawas work best) for the instant dosas as we pour the batter in a circular way instead of spreading the dosa like the conventional way.

Check out few interesting Dosa Recipes in my blog here:
For complete range of various breakfast options do check out my recipe index.


Instant Wheat Flour Dosa Recipe:
Yields 5-6 dosas
Prep time:5 mins | Cooking time:10 mins | Total time:15 mins
Cuisine: South Indian  | Category: Breakfast

Ingredients:
1/2 cup Wheat flour
1/4 cup Rice flour
2 tbsp fine chiroti Rava(or regular rava)
1 1/2 cups Water(see notes)
1/2 tsp Green chili paste
2 tbsp chopped Coriander leaves
1 tsp Cumin seeds
Salt to taste
Oil,to roast dosas

Method:
  • Mix wheat flour with rava,rice flour and add 1 1/2 cups of water to it and mix until no lumps are formed.
  • The batter should be thin enough to pour it over the pan,it should not have spreading consistency.Keep this aside for 5-10 mins.
  • Add salt, green chilli paste, chopped coriander leaves,cumin seeds and slightly crushed pepper corns to it and give a proper mix.
  • Now check the consistency of batter as the rava absorbs water,check it and add more water if required to get the pouring consistency as shown in the pic.The consistency of batter should be very thin like how we do for rava dosa.
  • Pour a ladle full of dosa batter from the outward base of the hot tawa in a circular motion to the center,fill the major gaps in between.But do not try to fill all the small gaps,those gaps helps in making the dosa more crispier.This is a very important step in making these kind of oats dosa.The crispyness depends on the way you pour the batter on the tava and the flame you manage while cooking the dosa.
  • Pour 1 tbsp oil approx over it and cover it with a lid.(No need to add more oil if using Non stick pan).
  • Let it initially cook on medium flame for 1-2 mins and remove the lid and increase the flame later and cook for another 2 mins until you see brown/red patches.(No need to turn the dosa).But do not try to remove the dosa in between while it is roasting.We should remove it only when you are sure that the dosa is perfectly roasted.
  • Remove it from the pan and serve it directly and do not drop them in hot boxes.It should be served on to the plate immediately to enjoy the flavor and crispiness of the dosa.
  • Reduce the flame for one minute and start prepare the next dosa.Do not pour the batter on high flame.Always stir the batter before preparing the next dosas.
Serve it hot right from the pan and on to the plate with Coconut chutney/Onion chutney/Tomato chutney/Sambar or any accompaniment of your choice.

instant wheat flour dosa

Notes:
  1. The addition of chiroti rava is optional but it makes the dosa crispy, in case you don't get it use regular upma sooji for it.
  2. I added 1 1/2 cups of water to the batter to get the desired consistency.However it depends on the kind of rava we used,so feel free add extra water(up to 2 tbsp or 1/4 cup) depends on the required consistency.
wheat flour dosa

Mixed Vegetable Sagu | Vegetable Saagu Recipe

$
0
0
vegetable saagu
Mixed Vegetable Sagu or Saagu, as we call is a famous combination for breakfast varieties like Set dosa and Poori and is served in most of the darshinis and hotels in Karnataka.My favorite combination is with Set dosa and infact Set dosa-Sagu is my most favorite breakfast and would not miss to order it in my favorite darshinis when I visit Bengaluru. This not only tastes delicious but it is also a good way to add vegetables during the breakfast time. Saagu tastes much different from the Mixed Vegetable Kurma though we find the ingredients are much similar.
vegetable saagu

Check out other famous Karnataka Breakfast recipes here:
saagu

Mixed Vegetable Saagu Recipe:
Serves 2-3
Prep time:15 mins | Cooking time:30 mins | Total time: 44 mins
Cuisine: South Indian | Category: Side dish for Dosa/Poori/Chapathi

Ingredients:
2 cups of finely diced Mixed Vegetables(Carrot,Potato,Beans,Green Peas,Cauliflower)
1 Onion,roughly chopped
1/2 tsp Mustard seeds
2 tbsp Oil/Ghee
Salt to taste

To grind:
1" Cinnamon stick
4-5 Cloves
1-2 Marathi Moggu
1/2 cup fresh grated Coconut
1 tbsp Khus khus
1 tbsp Fried gram
5-6 Green chillies
a handful of chopped Coriander leaves,optional
1 tsp Oil

Method: 
  • Heat a tsp of oil in a kadai/pan and add green chillies and fry them, but be careful as the whole green chillies might burst.You can make a small slit if you want to avoid bursting.Add cinnamon,marathi moggu and cloves to it and fry for sometime.
  • Grind the fried ingredients with grated fresh coconut,khus khus, fried gram, coriander leaves and make it into a smooth puree.
  • In a cooker,heat oil crackle mustard seeds and fry chopped onions until pink.Now add vegetables and fry until they are slightly crisp.
  • Add the ground masala and fry until the mixture leaves the oil and then add enough salt and 1 - 1.5 cups of water and pressure cook for 1-2 whistles(do not over cook).Once the pressure is released add lemon juice to it and give a good stir.
Serve hot with Poori or chapathy or Set dosa or Atukula dosa.

saagu

Notes:
  1. You can even add vegetables like cabbage, knol-khol to saagu. My aunt suggests to add even add beetroot but I usually don't add it as it changes the color of saagu, but you can add while preparing the red color sagu.
  2. The addition of  Khus-khus is optional but it adds a nice richness to the gravy.You can even add cashewnuts if you want.
  3. This sagu would be slightly greenish because of the usage of green chillies and coriander in the recipe.If you want it to be red in color, skip green chillies and coriander in the recipe and add red chillies and tomato while grinding the paste.Also, replace lemon juice with tamarind pulp at the end.
mixed vegetable saagu

Khotto | Kottige (Idlis steamed in Jackfruit leaves)

$
0
0
khotto
Khotto is nothing but Idlis, but the idli batter is steamed in jackfruit leaves which makes it quite distinct in taste and look. The jackfruit leaves add wonderful aroma to the khottos and I quite like the flavor and taste of it.'Khotto' is also known as 'Kottige' and it is called as 'Gunda' in Konkani. Khotto is speciality of Coastal region of Karnataka and is usually served in the hotels for breakfast, it is usually paired with chutney or sambar for vegetarians and with spicy chicken gravies for the non-vegetarians.I have tried this a couple of times in the hotels when I visited Mangalore few years back and also in few breakfast joints in Mumbai.I never got to try it at home as I could not get jackfruit leaves here in Mumbai.
khotto
During one of those usual chats with my mom about cooking I casually mentioned about it and my mom promised me that she will procure these leaves for me when I visit her.During my last visit to Bangalore as promised by her,she made sure that I got my hands laid down on those beautiful aromatic leaves.As I was preparing the baskets for the first time I was very much excited to prepare these basket idlis for our breakfast.I could not find any sticks at home to prepare these baskets but that did not stop me from trying it,I stapled the baskets instead of using sticks.I made sure that the pins would not come in contact with the batter while steaming but still I would not recommend you to try stapling it as it is not safe and definitely use sticks to make these baskets.I find the toothpicks are too thick to use and also its difficult to find the old kind of broom stick these days hence the best option to use is the dried sticks of the curry leaves which is easy to find everywhere.Now on to the recipe.
idlis steamed in jackfruit leaves

khotto

Before going to the recipe, if you are interested check out other Idli varieties in my blog:
khottige

Khotto | Kottige Recipe:
makes: 6 khottos
Prep time:45 mins | Cooking time:15 mins | Total time:1 hr +
Cuisine: Konkan/Karnataka | Category: Breakfast

Ingredients:
for the batter:
3 cups Idli Rice or Par boiled Rice(or 2.5 cups Idli Rava)
1 cup whole Urad dal
Salt to taste

for the baskets:
24 (or more) same sized Jackfruit leaves
unused broomstick or dried curry leaves stick or toothpicks - as required

Method:
to prepare batter:
  • Soak rice and urad dal separately for 3-4 hrs.If you are using Idli rava soak it for just 1 hr before grinding.
  • Wash the urad dal and grind to a fine batter in the wet grinder/mixie and remove it and keep it aside.
  • Now grind the idli rice to a slight coarse batter,the consistency of batter should be like slight rawa textured batter.If you are using idli rawa,squeeze the idli rava and add it to the ground urad dal and grind for 5 minutes.Keep the batter thick and do not add much water while grinding.
  • Add this to ground urad dal batter and mix well and add enough salt and let it ferment for 12-14 hrs.
to prepare baskets:
  • Take four equal sized jackfruit leaves and place two leaves with the corners(not the stem side) slightly overlapping on each other and join them with a piece of small stick.Now place the thrid and fourth leaf and again join them at the edges with the help of the sticks.The picture will give you a better idea.
  • Now fold the corners(stem side corners) such that the side edges of the leaves overlap on each other and leaves no gap in between, pin the overlapped portion carefully so that there would not be any leakage of the batter while steaming.Repeat for all the edges and pin together to form a basket.See the pictures for better idea.
  • Repeat and prepare all baskets.
to prepare Khotto:
  • Pour batter until it covers 3/4th of the basket and place the baskets carefully in the steamer or cooker(without whistle) and steam the khottos for 15-20 mins. While steaming do not try to overcrowd the steamer with baskets but make sure that there is not much gap in between them.
  • While opening tear the leaves carefully so that the khotto can slip out of the basket without getting stuck to the leaves and loose its shape.
Serve them hot with Coconut chutney,Sambar or any spicy gravy.
khotto

khotto

Notes:
  1. You can use your idli batter to prepare these khottos.
  2. If you do not find jackfruit leaves you can try with banana leaves, but that gives a different aroma and can not be substituted with jackfruit leaves.It is just for a change.
  3. Do not overcrowd the steamer with the baskets while steaming but make sure there is not much of gap in between the baskets.
khotto

Beans Sambar | Karnataka Style Sambar Recipe using fresh Coconut

$
0
0
beans sambar
Sambar and Rice is a very staple combination in any south Indian home.The versions of sambar vary from state to state but the basic ingredients are almost similar.I have posted many Sambar recipes which are prepared using ready sambar powder-which is typical Andhra version and today I am posting my mom's version which is prepared using freshly roasted spices and coconut. I feel that the Karnataka style Sambar tastes best with rice where as the Andhra style sambar goes well with both rice and idli/dosa varieties.I have my own set of vegetables to be put in these sambar varieties like drumsticks,brinjals,ladiesfinger,bottle gourd,radish,carrot-potato-brinjal combo goes well with Andhra style sambar where as the vegetables like beans, cluster beans, broad beans,chow-chow, radish,drumstick and greens go well with the Karnataka style sambar.

Check out other sambar recipes in my blog:
beans sambar

Beans Sambar Recipe -Karnataka style:
Serves 2-3
Prep time:10 mins | Cooking time:30 mins | Total time: 40 mins
Cuisine: South Indian | Category: Side dish for Rice - Main Course

Ingredients:
1/2 cup Toor dal
20-25 French Beans
1 Onion, diced or 12-15 Shallots
1 large Tomato, chopped
a small gooseberry size Tamarind
1/4 tsp Turmeric powder
1-2 tsp grated Jaggery,optional
2 tsp Oil
Salt to taste

to roast and grind:
2 tsp Coriander seeds
1/4 tsp Peppercorns
1/2 tsp Cumin seeds
2 Red chillies,spicy variety
2 Byadige Red chillies
1/3 cup grated coconut

to temper:
2 tsp Ghee/Oil
1/2 tsp Mustard seeds
1-2 Red chillies
a sprig of Curry leaves
a pinch of Asafoetida

Method:
  • Chop the corners of beans and cut them into 1" pieces by removing the fiber in between with your hands.
  • Wash and soak toor dal for 10 minutes in 1.5 cups of water. Add turmeric powder to it. In a separate container add chopped beans and tomato and pressure cook dal and vegetables separately for 3 whistles, Once the pressure drops slightly mash the dal with a wooden ladle.
  • Soak tamarind in water for some time and extract pulp from it and keep it ready.
  • Dry roast coriander seeds, cumin seeds, red chillies and pepper corns and grind them along with freshly grated coconut to a fine and smooth paste.You can even saute the fresh grated coconut at the end for half a minute along with the spices,this way the sambar does not spoil quickly even in summers.
  • Heat oil in a big kadai/pan and add diced onions and fry until they turn translucent. Add boiled vegetable pieces and cooked dal to it.
  • Add ground mixture , tamarind pulp, salt, jaggery and mix nicely and boil it until the raw smell of the ground paste is gone.Also add enough water to get the required consistency while boiling.
  • Taste the sambar once and adjust the seasoning if needed. Sambar thickens slightly when it sits, so adjust the consistency according to your requirement. 
  • Heat ghee/oil in a small tempering pan and crackle mustard seeds and add red chillies, curry leaves and asafoetida and fry for half a minute and add the tempering to the sambar at the end and mix well.
Serve it hot with steamed Rice and fryums and a vegetable stir fry.

Notes:
  1. You can replace beans with any other vegetable like carrot, cluster beans, drumstick, pumpkin,chow-chow, potato,raw papaya, brinjals,broad beans(chikkudu) etc or a combination of mixed vegetables.
  2. You can follow the same process for ladies finger sambar, in that you need to fry the ladies finger pieces in oil first and then add to the sambar while boiling.You should not pressure cook the ladies finger pieces.
  3. You can even prepare sambar with greens like amaranth, fenugreek(methi), palak or mixed greens following the same process.It tastes nice with Ragi Mudde.
  4. Instead of boiling the tomato, you can even grind the tomato with the other ingredients, that gives a nice color to sambar.
  5. For a quicker version you can even grind tomato,grated coconut with Karnataka style sambar powder to a fine paste and follow the same recipe.
karnataka style sambar

Milk Powder Gulab Jamun | Gulab Jamun Recipe

$
0
0
Blogging has taken a back seat as the life has become busy after the arrival of little V as he keeps me busy all day.Though I want to blog regularly it is not happening as I get exhausted by the end of the day.With Holi around the corner I thought I will re-energize myself by posting a festive recipe apt for the occasion.
Coming to the post, Gulab Jamun is one of the most popular sweets which takes its place in any occasion - be it a festival or any other big functions.Gulab Jamun was never a favorite for me during my childhood but that was the only sweet I craved in my pregnancy and no wonder that it has become one of my favorite sweets now.There are many variations to Gulab Jamun like Dry Jamoon, Kala Jamoon etc all of which has a unique taste.Traditionally Gulab Jamun is prepared with Khoya(mawa) which tastes fabulous and today I am posting Gulab Jamun recipe using milk powder which is a good alternative to the traditional Khoya jamun.I would definitely post the other version sometime soon.

Check out other sweets recipes on my blog:

Gulab Jamun Recipe using Milk powder:
Yields:20-25 jamuns | Author: Prathibha
Prep time:15 mins | Cooking time:30 mins | Total time: 45 mins
Cuisine: South/North Indian | Category: Sweets/Desserts

Ingredients:
for jamun:
1 cup Milk powder
1/3 cup Maida/Flour
2 pinches of Cooking Soda
1 tbsp fresh Curds
3-4 tbsp Milk
1 tbsp melted Ghee
Oil/Ghee for frying

for sugar syrup:
1 1/2 cups Sugar
1 1/2 cups Water
10-12 Saffron strands
2-3 Cardamom pods, crushed
Rose essence,few drops or 1 tsp Rose water

Method:
to prepare sugar syrup:
  • Combine water and sugar in a big broad vessel and let it come to a nice boil.Add cardamom powder, saffron strands and rose essence or rose water and let it boil until it becomes thick and reach single thread consistency.Remove any scum from the syrup with the help of a ladle.Switch it off and keep it ready before we proceed to make jamuns.
to prepare jamun:
  • Sieve flour(maida), milk powder and cooking soda together for 2-3 times without any lumps.
  • Take this mixture in a bowl and add ghee,curd and mix with finger tips.
  • Sprinkle milk little by little and mix gently by rotating your hand in one direction to form a smooth dough.DO NOT knead the mixture.You can even use water instead of milk to make the dough.
  • Keep the mixture aside for 5 mins.
  • Divide the mixture into 20-25 equal portions and make them into evenly sized smooth balls. 
  • Deep fry them in a batch of 7-8 balls in moderate hot oil/ghee until it turns dark brown in color. You need to roll them regularly in oil so that the jamuns get nice golden brown color on all the sides.Repeat the process for the other batches.
  • Drain the oil/ghee nicely from the jamuns and let them sit for a minute or two or drain in a tissue paper and then add jamuns to the prepared hot sugar syrup and let it soak for 2-3 hrs.
Serve it hot/warm or at room temperature.You can serve jamuns warm with a scoop of vanilla ice cream.
Notes:
  1. It is important to make smooth dough and also you should not knead the dough.This helps in yielding soft jamuns.
  2. Jamuns double in size ,hence make sure you use a broad vessel for syrup giving enough room for the jamuns to expand.
  3. You can use either water or milk to make the dough, but milk makes the jamuns very soft and tasty.
  4. The oil should not be very hot, it should be moderate hot and also you should fry the jamuns in medium heat by rolling them in between constantly.
  5. You can use even kewra water instead of rose water.
  6. You can even add slivered pistachios or almonds on jamuns while serving.

HOLI RECIPES 2015 | HOLI SPECIALS

$
0
0
HOLI - the festival of Colors is on 6th March ie.tommorow.It is a major festival celebrated in all parts of India with lots of enthusiasm. During Holi people play with colors and color sprinklers and is usually followed with music,dance and the most important -lavish food.I am sharing you a list of recipes in my blog which might be helpful in case if you are planning to have a party or you want to make something special for the festival.
holi recipes
HOLI Special - SWEETS | KHEER | HALWA
HOLI Special - Desserts


HOLI Special - SNACKS | APPETIZERS | CHAATS
 MAINCOURSE

Flat Breads | Poori:
Pulao | Biriyani:
Side dish - Dry curries:
Side dish - Gravies:
Side dish - Dals | Lentils:
BEVERAGES

Multigrain Crackers | Eggless Savoury Biscuits

$
0
0
multigrain crackers
When it comes to baking, I must admit that I am bit lazy these days and also need a push to bake something.The fact is that we do not eat much of fatty stuff and hence I don't bake much of cakes on regular basis unless it is for an occasion.But if I ever come across any healthy recipes related to baking I do not mind to try them immediately and this is one recipe which I tried it almost immediately by modifying the recipe a bit.I made them very long back but I could not post the recipe as I forgot about this post which was lying in my drafts from so long.
multigrain crackers
I liked the usage of all the millet flours in the recipe and the resultant crackers are guilt free and we can actually feel good that we are indulging into healthy stuff.I have prepared these crackers a couple of times with variations and it came out well and I am posting here what worked well for me.You can serve these crackers with dips of your choice - Hummus, Sour Cream dip etc,check out more Dips recipes here or you can even munch on them just like that, the nuttiness from the sesame seeds makes these crackers more tastier to eat.
multigrain crackers

Multigrain Crackers Recipe:
Source: Divine taste
makes around 40-50 small crackers
Prep time: 15 mins |  Baking time: 20 mins | Total time:30-40 mins
Cuisine: Indian | Category: Baking - Snacks

Ingredients:
1/2 cup Whole Wheat flour
1/4 cup Jowar flour(Sorghum ka atta)
1/4 cup Finger millet flour(Nachni/Ragi)
1/4 cup Pearl millet flour(Bajra)
1/4 cup quick cooking Oats
1/4 cup Sesame seeds
1/4 cup + 2 tbsp Olive Oil
1/2 cup + 3 tbsp Water
Salt to taste(roughly 3/4 tsp)

Method:
  • Slightly roast the sesame seeds until they start popping up in the pan.
  • In a bowl mix all the flours-whear,jowar, bajra ,nachni with oats,roasted sesame seeds, salt and oil. Mix everything together with your hand so that all the ingredients are uniformly mixed.
  • Now add water in batches and mix until you get chapati dough consistency.Adjust the water quantity as the water absorption capacity for each flour is different.You might need a couple of tbsp more or less to make the dough.Rest the dough for 15-20 mins.
  • Preheat the oven at 180 deg C for 8-10 mins.
  • Divide the dough into two equal portions and roll each portion into a big circle of 7-8" in diameter and thicker than the roti.
  • Using a cookie cutter cut into various shapes - circles, squares,triangles,rectangles or shapes of your choice.
  • Arrange them on a baking tray lined with parchment paper or baking sheet and bake it for 20-25 mins at 160 deg C.Please keep an eye after 15-20 mins and remove them if you see the edges turning red in color as these become more crispier once they cool down.
Store them in an air tight container.
Serve these healthy multigrain crackers with Dips of your choice or eat them as a snack.You can even use these crackers as a base like canapes.
multigrain crackers
Notes:
  1. You can use flours of your choice and alter the recipe accordingly.
  2. Sesame seeds can be substituted with cumin seeds, carom seeds, khus khus for a variation.
  3. You can also add red chilli powder or coarsely ground pepper powder if you want to make them spicy.
eggless savoury biscuits

Technorati Tags:

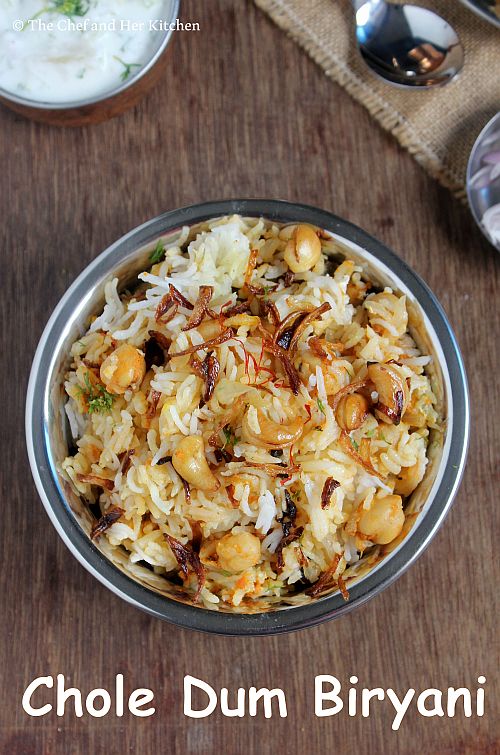
Chole Biryani | Chickpeas Biryani | Chole Dum Biryani Recipe

$
0
0
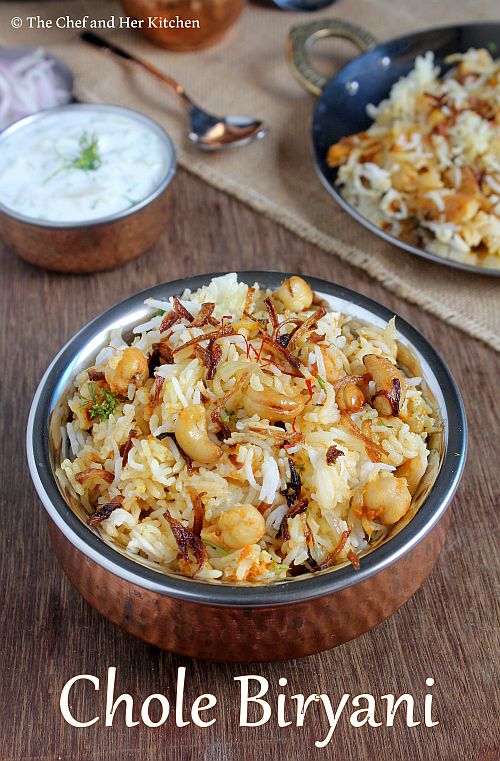
chole biryani
Biryani or Pulav appears mostly on sundays for lunch at our place as hubby dear prefers a one pot meal for lunch .Both of us are big fans of a good dum style Biryani but the preparation process for dum Biryani is quite elaborate,hence I do it occasionally or when both of us crave for it.So most of the times I end up preparing a simple one pot kind of Biryani than the dum biryani as it is time consuming.
chickpeas biryani
There are various styles of cooking Biryani like Lucknowi Biryani, Awadhi Biryani ,Calcutta style Biryani, Hyderabdi Dum Biryani,Mughlai Biryani,Kashmiri Biryani etc.I myself have never experimented much on cooking various styles of Biryani.I think its high time for me to understand the differences in their preparation process and start cooking all these delicious Biryanis to treat my family.Today I am sharing Chole Biryani which is definitely a change from the regular Vegetable Biryani, the process of cooking the Chole Biryani I adapted is very similar to the Vegetable Biryani.I usually prepare fresh Biryani masala when I prepare Dum Biryani as the aroma of freshly prepared masala takes the biryani to another level.But if you are short of time you can use either store bought Biryani masala or the home made Garam masala instead.One can follow the same procedure to prepare mixed vegetable biryani by using all mixed vegetables instead of chickpeas in the recipe.
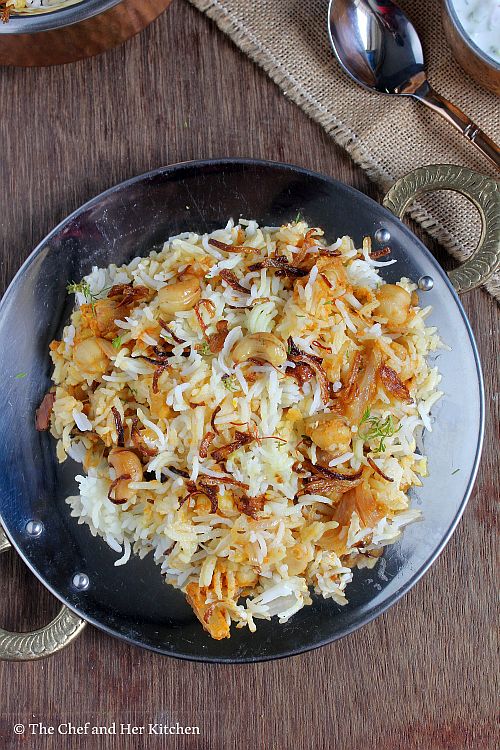
chickpeas biryani

chana biryani

If you are a Biryani lover,check out various Biryani Recipes in my blog:
Also,you can check out various Rice varieties and Pulav recipes in my blog here.
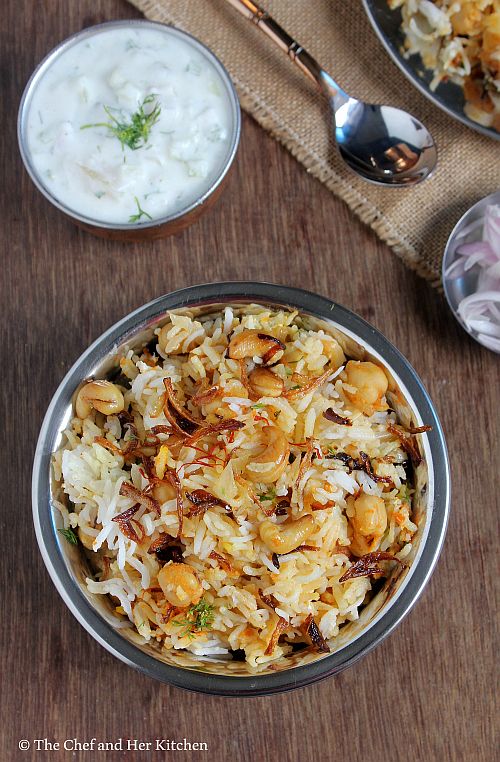
chana biryani

Chole Dum Biryani Recipe:
Serves 3-4
Prep time:30 mins | Cooking time: 1 hr | Total time: 1 hr 30 mins
Cuisine:North Indian | Category: Main Course-Biryani

Ingredients:
for Rice:
2 cups Basmati Rice
6-7 cups Water
1 Bay Leaf
1" Cinnamon
3-4 Cloves
2 tbsp Ghee
1 tsp Salt

for Chole gravy:
2 cups cooked white Chickpeas
2 medium Onions,chopped
3 Tomatoes,finely chopped
1 tsp ground Biryani Masala( or Garam masala)
2 tbsp chopped Coriander leaves
Salt to taste
3-4 tbsp oil

to roast and grind to a powder- Biryani Masala:
2" Cinnamon
4-5 Cloves
1 tsp Coriander seeds
1/2 tsp Cumin seeds
1 Cardamom
1 tsp grated Nutmeg

to grind to a paste:
5-6 Red Chillies
2 tsp Fennel seeds
6-8 Garlic cloves
1 1/2" Ginger

other Ingredients:
1/2 cup beaten Curd
1/4 cup chopped Coriander leaves
1/4 cup chopped Mint leaves
10-12 Cashew nuts
2 tbsp warm Milk
12-15 Saffron strands
2 large Onions,thinly sliced
Oil,to deep fry
2 tbsp Ghee

Method:
prior preparations:
  • for Saffron milk: In 2 tbsp warm milk add slightly mashed 12-15 saffron strands and set it aside for 10 mins.
  • for Caramelized Onions: Deep fry finely sliced onions in oil until they turn crispy and slightly brownish in color. Drain them onto a paper towel.
  • to prepare spice powder: Dry roast all the ingredients mentioned under to roast and grind for biryani masala and grind to a fine powder.
  • to prepare the spice paste: Soak red chillies and fennel seeds in hot water for  half an hour and grind them with ginger and garlic to a fine paste.
  • to fry Cashewnuts: Heat 2 tsp ghee in a pan and add whole cashew nuts and fry them until they turn light brown in color and remove them and keep aside.
to prepare rice:
  • Wash and soak basmati rice for 15 mins.
  • In a large pot bring water to a boil add bay leaf,cinnamon and cloves,ghee,salt and soaked rice and cook until the rice is 3/4th cooked. Drain all the water and run cold water through the rice to stop any further cooking.
to prepare Chole gravy:
  • Heat oil in a pan and fry onions until they turn transparent. 
  • Add the ground chili-spice paste and fry until the raw smell is gone. 
  • Now add finely chopped tomato and fry until it is pulpy.
  • Add the cooked chickpeas,a tsp of freshly ground biryani masala and salt and 1/2 cup of water and let it simmer nicely for 8-10 mins until the chickpeas absorbs all the flavors and the mixture becomes slightly dry.
  • Lastly add coriander leaves and mix well.
Putting the chole biryani together:
  • Divide the cooked rice into 3 equal parts and the Chole gravy into 2 equal parts.
  • Take a heavy bottom pan (I used heavy steel here) and apply generous amount of oil/ghee at the bottom of the pan and start the layering process in the following way.
  1. a layer of thinly sliced onions(optional,I added it as I did not deep fry many onions for the other layers)
  2. Spread one layer of chole gravy on the onions(if using) or at the bottom.
  3. Spread one layer of Rice.
  4. Spread 1/2 cup beaten curd,one half of the caramelized onions,1/2 tsp of freshly ground Biryani Masala, half of Saffron Milk, 2 tbsp of Coriander leaves and 2 tbsp of Mint leaves.
  5. Spread one more layer of Rice.
  6. Spread the rest of the chole Gravy.
  7. Spread the last layer of Rice.
  8. Top it with the left over caramelized onions, fried cashewnuts, 1/2 tsp ground biryani masala, saffron Milk and the remaining coriander leaves and mint leaves.
  • Then add 2-3 tbsp milk and  2 tbsp of ghee from the top and cover the vessel with aluminium foil and cover it with lid and fold the foil carefully and try to seal the gap in between the vessel and the lid. Place this vessel/pot on a thick tawa and cook on medium flame for 15-20 mins or till it is completely cooked.You can alternatively bake this in oven at 170 deg C for 15-20 mins.
Serve it with Onion-tomato raita or Boondi raita with chips/papad/salad.
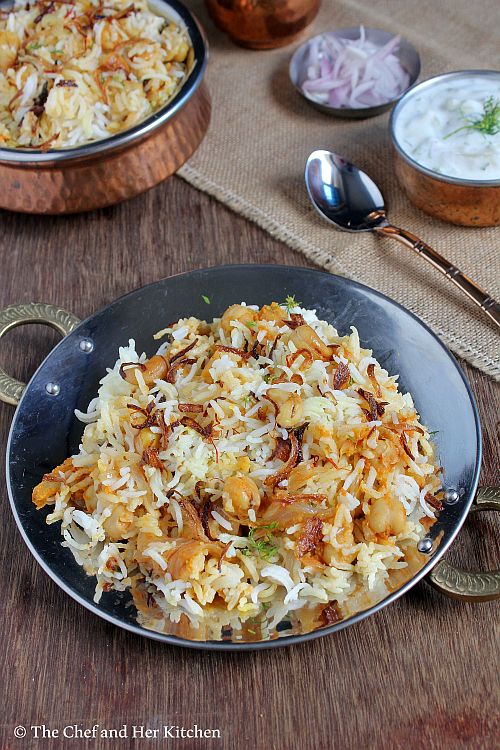
chole biryani
Notes:
  1. You can follow the same procedure to prepare mixed vegetable biryani by using all mixed vegetables, you can even deep fry the vegetables if you want it more rich.
  2. You can add potatoes to the chole gravy if you like it.
  3. Use good quality basmati rice for more finer rice.
  4. I used minimal spices while boiling the rice, you can use more spices like mace, peppercorns,star anise along with the spices I used.
  5. I highly recommend to use deep fried onions as it lends a nice taste to biryani. Here I used deep fried onions just for the top layer and hence I used sauteed onions as the first layer.
  6. You can use Garam masala instead of the freshly ground masala mentioned in the recipe.

Ugadi Recipes 2015 | Ugadi Menu

$
0
0
Ugadi festival is on the 21st of March. Ugadi is a major festival in Andhra and Karnataka as it is considered as the start of a new year.On Ugadi day, we prepare 'Ugadi Pacchadi' which is a mix of all the basic tastes 'shadruchulu'. It is a mix of tamarind juice, salt, chopped raw mango, jaggery and neem flowers and is adjusted according to our taste buds.
We usually prepare either 'Holige (Obattu)' or 'Boorelu (Poornalu)' or 'Bele Kadubu' for Ugadi as the main sweet along with some kheer/payasam and other festival delicacies.At our place,the usual Ugadi menu comprises of Maavinkayi Chitranna ( Raw mango rice) ,stir fry, vada, sundal, Holige Saaru, Holige, Payasam and Rice.
I am trying to give various options for Ugadi menu in every category to make your planning easy.So please go through it and celebrate the festival with more fun and food.
kayi kadubu
Check here to find out how to make Ugadi  Pacchadi for Ugadi.

Traditional Sweet Varieties:
  1. Hoornada Holige/Obbattu
  2. Halu Holige | Paal Poori | Paala Obabttu 
  3. Boorelu | Sukkinunde | Suzhiyan
  4. Groundnut Holige | Shenga Holige
  5. Karida Kadubu | Kari Kudumulu | Fried Sweet Dal Dumplings
  6. Karida Kayi Kadubu | Fried Modak with Coconut stuffing
  7. Garugu Hollige/ Hollige with rice flour-coconut filling
  8. Pooran (Puran) Poli | Bobbatlu
  9. Sajjappa | Sojja Appalu | Halwa Poori
 Sundal & Stir fry varieties:
  1. Chana Dal Sundal
  2. Lobia Sundal/Alasandula Guggillu
  3. Kabuli Chana Sundal
  4. Kala Chana Sundal/Black Chickpeas Sundal
  5. Peanut sundal
  6. Sweet corn Sundal 
  7. Mixed Bean Sundal 
  8. Kosambari | Moong dal Salad 
  9. Beans Stir fry
  10. Beans-carrot Palya
  11. Raw Banana Stir fry
Vada/Snack varieties:
  1. Alasandula(Lobia) Vada/Fritters
  2. Aratikaya(Raw Banana)  Bajji
  3. Punugulu/Dosa Batter Fritters
  4. Masala Vada/Chana dal Vada
  5. Medu Vada
  6. Mixed Dal Ambode(Vada)
  7. Mosaru Ambode/Dahi Dal Vada
  8. Dahi Vada/Perugu Vada/Mosaru Vade
  9. Saggubiyyam Bonda/Sago Bonda
  1. Korra biyyam Payasam | Foxtail Millet Kheer
  2. Mango Sheera | Mango Sooji Halwa 
  3. Moong Dal Kheer / Pesara Pappu Payasam
  4. Moong Dal Kheer - version 2 with sugar 
  5. Paal Payasam | Rice Kheer with Chana dal - using pressure cooker method
  6. Paal Payasam / Rice Milk Pudding
  7. Rava Payasam | Sooji Kheer 
  8. Rasayana | Balehannu Rasayana
  9. Sabudana(Sago) Kheer | Saggubiyyam Payasam
  10. Semiya Kesari 
  11. Semiya Kheer | Vermicelli Payasam
Rice Varieties:
  1. Aava Pettina Pulihora | Tamarind Rice with Mustard flavor
  2. Chintapandu Pulihora- Andhra Style
  3. Coconut Rice
  4. Dabbakaya Pulihora/Indian Grapefruit Rice
  5. Lemon Rice/Chitrannam
  6. Mamidikaya Pulihora/Maavinkay Chitranna
  7. Methi Peas Bath | Menthya Batani Anna
  8. Pulihora/Puliyogre
  9. Raw Mango Rice/Mamidikayi Gojju Annam
  10. Vangi Bath

Pulusu Biyyam | Tamarind Bath with Roasted Rice

$
0
0
pulusu biyyam
Pulusu Biyyam is one of our community style recipes and it is basically tamarind bath,rice made using roasted rice.Tamarind bath is bit different from the regular Tamarind rice as we use roasted rice in Tamarind bath and is cooked in the tamarind water like how we do for Tamarind Upma where as in the regular tamarind rice we cook the rice separately and mix it with the tamarind mixture.Both tastes completely different from each other but tastes good in its own way.You can prepare this for breakfast or it works great as a one pot meal for lunch.We prepare another version called 'Pulusu Upma' where the roasted rice is replaced with roasted rice rava but the rest of the procedure is similar.Pulusu Upma is a quicker version compared to pulusu biyyam as the rice takes bit longer to cook when compared to rava.
pulusu biyyam
If you like tamarind based rice or breakfast recipes, you can check out other recipes here:
pulusu biyyam


Check out more breakfast recipes of our Community style:
pulusu biyyam
Pulusu Biyyam | Tamarind Bath with Roasted Rice Recipe:
Serves 2 | Author: Prathibha
Prep time:10 mins | Cooking time: 30 mins | Total time: 40 mins
Cuisine: Andhra | Category: Breakfast

Ingredients:
1 cup Rice (Sona masuri or equivalent)
20-25 Shallots or 2 large Onions,cut into big chunks
3-4 Green chillies,slit
3.5 cups Water
2 tbsp chopped fresh Coriander
1/2 tsp Turmeric powder(optional)
1/4 cup Groundnuts
1 large lemon sized Tamarind
2-3 tbsp Jaggery
a sprig of Curry leaves
1 tbsp Chana dal
2 tsp Urad dal
1/2 tsp Mustard seeds
2-3 tbsp Oil
Salt to taste

Method:
  • Dry roast rice in a kadai until the rice turns slightly roasted and start looking white.Remove it from the pan and let it cool.
  • Soak tamarind in 1/2 cup of water for half an hour and extract pulp from it.
  • Heat oil in a thick aluminium kadai(which is ideal for making upma) or non-stick kadai and crackle mustard seeds.
  • Add ground nuts  fry until they turn little red in color and add chana dal and urad dal and fry until they turn golden brown.
  • Add slit green chillies,curry leaves and fry them until they wilt.
  • Add shallots or sliced onions and fry them until they are pink in color.
  • Add tamarind pulp extracted and 3 cups of water (1c rawa:3c water) to it.
  • Add turmeric powder,sambar powder,salt and jaggery to it and let it boil.
  • Add roasted rice to it and mix well.
  • Once everything is mixed,keep the lid on and cook it on low flame for 15-20 mins.Switch off the flame.
  • Add coriander to it and mix well.
  • Cover it and let it sit for 5 mins before you serve.
Serve it hot with some boondi/chips/cucumber.
pulusu biyyam

Notes:
  1. This tamarind rice is sour,sweet and spicy at the same time so adjust the seasoning as per your taste.
  2. We prepare another version called 'Pulusu Upma' where the roasted rice is replaced with roasted rice rava but the rest of the procedure is similar.Pulusu Upma is a quicker version compared to pulusu biyyam.
  3. I highly recommend to use shallots for this recipe, if you do no have you can use thickly sliced onions instead.
pulusu biyyam

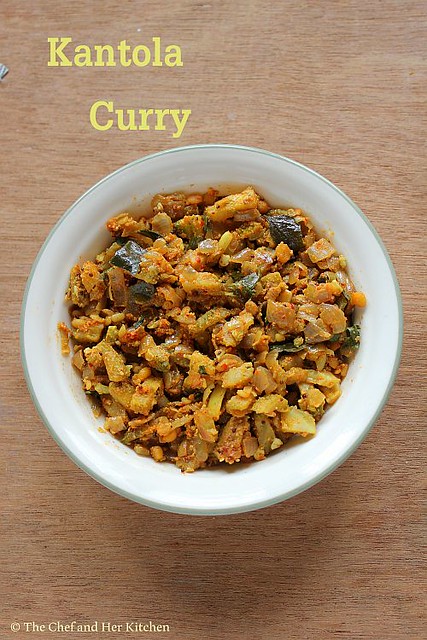
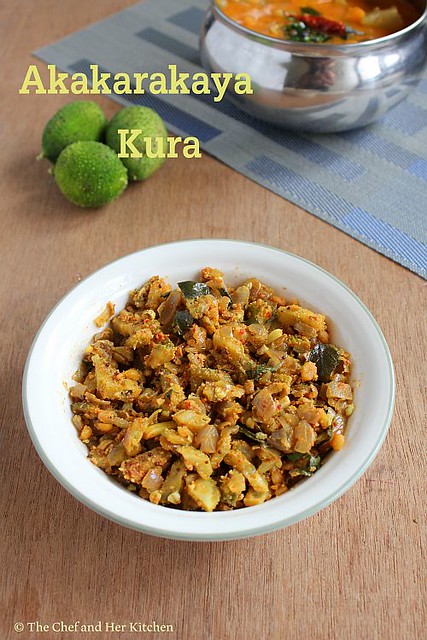
Akakarakaya Kura | Kantola Curry

$
0
0
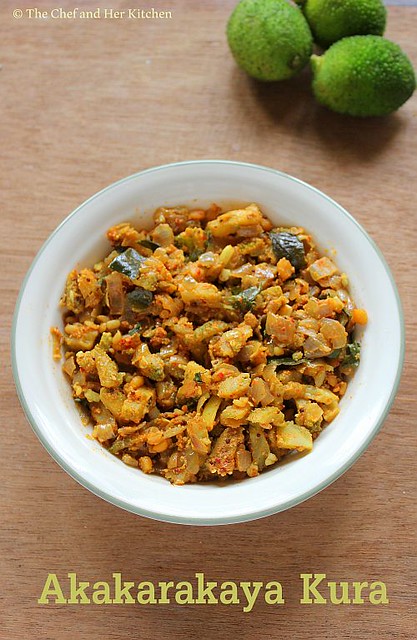
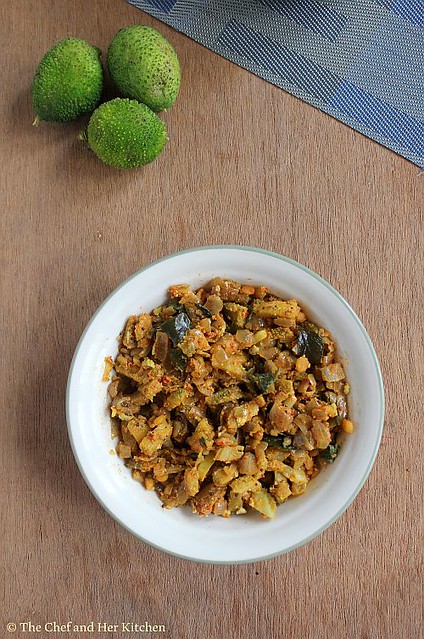
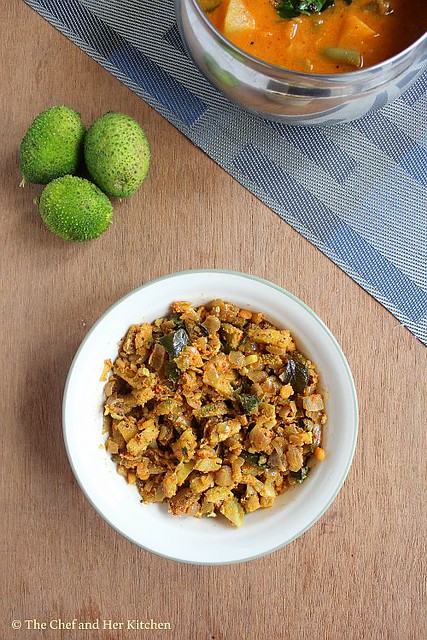
akakarakaya kura
My blog has been silent from past some time, the reason simply because was that the past few months I have become extremely busy with my toddler and also was busy with my family.Though I did not want to take a break from blogging, with the growing demands of my toddler I am finding it difficult to blog on regular basis.It takes a while for me to blog regularly with enthusiasm like before, till then I would try to update my blog when I find time, please bear with me!
akakarakaya kura
Akakarakaya,known as 'Kantola' in English is a kind of gourd which is slightly bitter in taste but not as bitter as bitter gourd.This vegetable is seasonal and hence when ever I find this vegetable in market I usually buy it as it is not easily available near my place.If you are not someone who likes bitter gourd this mildly bitter kantola would definitely impress you in the first taste.I usually prepare a simple stir fry or curry with this vegetable and not experimented other variations with this vegetable. I like this vegetable very much as it has slight crunch even after it has been cooked.If you want to check out Kantola Stir fry(Akakarakaya Vepudu) recipe check out here.
akakarakaya kura
Akakarakaya Kura | Kantola Curry Recipe:

Serves 2 | Author: Prathibha
Prep time:10 mins | Cooking time: 30 mins | Total time: 40 mins
Cuisine: Andhra | Category: Side dish-Lunch

Ingredients:
250 gms Akakarakaya/Kantola
2 Onions,chopped
2 tbsp Sesame seeds powder
1 tsp Red chili powder
1/2 tsp Turmeric powder
1 tbsp Chana dal
1 tsp Urad dal
1/2 tsp Mustard seeds
a sprig of Curry leaves
Salt to taste
1 tbsp Oil

Method:
  • Wash and cut the kantola into four quarters and cut into thin slices.
  • Heat oil in a kadai and crackle mustard seeds.Add chana dal and urad dal and fry until it turns red in color.
  • Add curry leaves and chopped onions and fry until it turns translucent.Now add the chopped kantola pieces and fry for 5-6 mins.Add turmeric powder to it and cover it and cook for 12-15 mins until it is done.
  • Add red chili powder, sesame seed powder and salt and mix well and cover it and cook for 3-4 mins and switch off the flame.
Serve it with Rice/Roti.
kantola curry

Notes:
  1. You can replace kantola with bitter gourd,bottle gourd or ridge gourd and follow the same process.In case if you are using bitter gourd,add salt and turmeric powder to the bitter gourd pieces and leave them aside for 15-20 mins and squeeze to remove extra water and follow the same process,this way it removes the bitterness of bitter gourd.
  2. Instead of sesame seed powder you can even use telagapindi in the recipe.
akakarakaya kura

Mango Phirni | Layered Mango Phirni | Mango Dessert Recipes

$
0
0
 mango phirni
This mango season I did not post a single mango recipe so far though we have been enjoying the mangoes thoroughly in their own form or few variations of them.When I was going through my drafts last week,these mango phirni photos caught my attention.I had prepared this dessert at my mom's place when we had my cousins coming over for breakfast to our place.Instead of preparing a uniform colored phirni I thought of preparing a layered version which makes it more appealing and it was a big hit and everyone loved the look of the dessert.
mango phirni

mango phirni
When I Invite guests I usually prefer preparing simple desserts which can be prepared ahead so that I can reduce my work at the last minute.Phirni is one such recipe which is simple to prepare but tastes very nice.Phirni is a very rich and creamy rice pudding and is a popular traditional dessert in India.It is very simple to make when it is made bit carefully otherwise one can even mess up with this simple dessert.It is more versatile and open to various flavors like Kesar Phirni and various fruit flavours like apple,strawberry,mango,peach etc and also carrot.I love all the variations as the addition of fruits not only changes the taste but also the look of the final dessert.
mango phirni

mango phirni

Check out other mango desserts/sweets recipes here:
mango phirni

Mango Phirni Recipe | Layered Mango Phirni:
Serves 5-6
Prep time: 10 mins | Cooking time: 30 mins | Total time: 40 mins+chilling time(2-3hrs)
Cuisine: North Indian | Category: Desserts

Ingredients:
3/4 litre Full Cream Milk
1 big ripen Alphonso(or Kesar variety)
3 tbsp Basmati Rice
1/3 cup Condensed Milk
2-3 tbsp Sugar,optional
1/2 tsp Cardamom powder
8-10 Almonds,blanched and slivered(or Pistachios)

Method:

  • Peel and cut the mango into pieces and grind it to a smooth puree.Reserve few mango pieces for garnish.
  • Soak basmati rice in water for half an hour.Drain the rice and grind to a slight coarse paste.Do not make into a very smooth paste,a slight coarse paste works best in giving a nice texture to the dessert.
  • Heat milk in a thick bottomed pan when it starts bubbling,simmer the flame and slowly add the rice mixture and stir continuously until it forms a thick mixture.It takes approximately 8-10 mins.If you are adding sugar you can add it along with rice, but if you are adding condensed milk you can add it after the rice mixture is thicken.You need to stir the mixture constantly,this step is most critical as you might end up with lumpy solution if you don't stir it continuously.If you end up having lumps,do not panic strain the mixture into another vessel and press the lumps in the strainer with the help of back of a ladle.Again keep the mixture back on the stove and continue cooking.Check the sweetness of the mixture, if you want more sweetness adjust it by adding more sugar or condensed milk at this stage.
  • Add cardamom powder and mix well.Once the mixture is thick turn off the stove.
  • Divide the mixture into two parts and add mango puree(reserve some mango puree) to one portion and mix it nicely.
  • Take 5-6 medium sized glasses or glass bowls and start layering.First add a tbsp of mango puree in all the bowls.Then add 2 ladles(6-7 tbsp) of white phirni in all the bowls.Once you finish filling the mixture in all the bowls,start with the bowl which you poured first and gently add 2 ladles of mango phirni taking care that the mixture will not mix up with the white portion as we want the layers to be seen separately.
  • Garnish with chopped mangoes,slivered/flaked almonds,pistachios and saffron strands.
Allow them to cool and keep in refrigerator for 3-4 hrs and serve chilled.This can be eaten warm,but the chilled one tastes better.

mango phirni
Notes:

  1. You can prepare just mango phirni instead of layering by adding more mango puree to the whole mixture.
  2. Instead of pureeing the mangoes, you can even add finely chopped mango pieces to the white phirni.
  3. I prefer to add condensed milk to the dessert as it gives richness to it,if you want you can use sugar instead.

    mango phirni


    Kaddu Ki Sabzi | Red Pumpkin Curry | Bhopla Bhaji

    $
    0
    0

    pumpkin curry
    My mom rarely used to prepare any pumpkin dish as she does not eat this vegetable.All she used to prepare with red pumpkin was a slightly sweetish gravy which pairs up beautifully with chapatis/plain rice flour rotis and also fryums using the thick pumpkin skin.Beyond those two recipes I never had tasted any other variations.After I started cooking I have started using this vegetable in my cooking more often and this version of Pumpkin curry I have learnt from my neighbor after shifting to Mumbai.It is a simple curry recipe which suits best even for those fasting days with few modifications in the recipe.
    pumpkin curry

    Check out other Pumpkin recipes in my blog:

    bhopla bhaji

    Kaddu Ki Sabzi | Red Pumpkin Curry Recipe:
    Serves 2 | Author: Prathibha
    Prep time:10 mins | Cooking time: 20 mins | Total time: 30 mins
    Cuisine: North Indian | Category: Side dish for Rice/Rotis

    Ingredients:
    350 gms Red Pumpkin
    1/4 tsp Fenugreek seeds
    1/2 tsp Cumin seeds
    a pinch of Asafoetida
    3/4 tsp Red chili powder
    1/4 tsp Turmeric powder
    1/4 tsp Garam masala powder
    1 tsp Amchur powder
    1-2 tsp grated Jaggery
    2 tbsp chopped Coriander leaves
    5-6 Curry leaves,optional
    2 tbsp Oil
    Salt to taste

    Method:
    • Wash and peel the pumpkin,remove the seeds and chop them into 1/2 inch uniform cubes.
    • Heat oil in a kadai and crackle cumin seeds and add fenugreek seeds and fry for 30 secs.
    • Add asafoetida,curry leaves and chopped pumpkin pieces and fry for a minute.
    • Add turmeric powder and red chili powder and fry for another 2-3 mins until the masalas coats the pumpkin properly.
    • Add jaggery to it and mix well and add 1/3 cup of water to it and cover it wit lid and cook it for 12-15 mins until it becomes soft.You can cook it until the pumpkin pieces becomes soft or slightly mushy based on your preference.
    • Add amchur powder,garam masala powder and salt to it and mix well.You can slightly mash few pumpkin pieces with the back of a ladle, do not mash all the pieces.The consistency should not be either thick or too mushy and runny, it should be slightly soft with chunks of  pumpkin pieces.
    • Add coriander leaves to it and switch off the flame.
    Serve it hot with Rice/Roti/Parathas/Pooris.

    Notes:
    1. If you are preparing it during fast you can use sendha namak instead of regular salt and follow the same recipe.
    2. The addition of jaggery enhances the taste of the curry,but if you do not want it you can avoid it completely.
    3. You can replace red pumpkin with sweet potato and follow the same process,even it tastes nice but the cooking time may vary.
    kaddu ki sabzi

    Technorati Tags:  ,

    Kothimbir Vadi Recipe | Kothmir Wadi | Maharashtrian Snacks Recipes

    $
    0
    0
    kothimbir wadi
    Kothimbir Vadi is basically fritters made up of Coriander leaves using besan(chickpea flour).You can basically call them as Coriander-Chickpea flour Squares.The preparation process of these fritters is quite different from the usual fritters like pakora etc.A batter is prepared using besan with lots of coriander leaves and few other spices and then it is steamed like dhokla, once it is cooled you can cut it into various shapes and deep fry or shallow fry the fritters.
    kothimbir wadi

    kothimbir vadi

    We just love all the typical maharastrian snacks - vada pav, sabudana vada, kothimbir vadi, misal pav, thalipeeth, bhajiya etc and we often to go to Prakash, a famous Maharasthrian eatery in Dadar to indulge into all these snacks.In Mumbai I tasted two versions of Kothimbir vadi - the ones which we get in shops and restaurants are yellow in color and are usually cut into cubes or big squares and are deep fried,I feel this version uses less coriander where as the version typically prepared in Maharasthrian households is bit different - they use lots of coriander and it is mixed with besan to form a dough kind(not batter) and is made into long thick cylindrical shaped mass which is further steamed and cut into thin roundels and shallow fried. I personally like the version what we get in shops and restaurants, its crispy outside and very soft inside which makes this snack more tasty. Though the ingredients are same the taste,texture and color of both the versions are different and tastes good in its own way. Today I am posting a version which is a cross in between both the versions and it tastes good too.
    kothimbir vadi

    kothimbir vadi

    Check out other Maharasthrian snacks recipes:

    kothmir vadi

    Kothimbir Vadi | Kothmir Wadi Recipe:
    yields 12-16 pieces
    Preparation time: 15 mins | Cooking time: 45 mins | Total time: 1 hr +  cooling time
    Cuisine: Maharashtra | Category: Snacks/Breakfast

    Ingredients:
    1 cup Chickpea flour(Besan)
    3 tbsp Rice flour
    1 - 1.5 cups Coriander leaves,chopped
    1/4 cup roasted and crushed Peanuts
    1 tbsp Sesame seeds
    2 Green Chillies
    3/4" Ginger,chopped
    1/4 tsp Turmeric powder
    1/8 tsp Garam masala powder
    1/2 tsp Cumin powder,optional
    1/4 tsp Red chili powder
    a pinch of Cooking Soda
    1 tbsp Lemon juice
    1 tsp Oil
    Salt to taste
    1.5-2 cups of water,approx

    Method:
    • Grind green chillies and chopped ginger to a paste.

    • Mix all the dry ingredients like besan, rice flour, turmeric powder, red chili powder, salt and cooking soda in a big bowl.Add water(1.5 cups approx) to it and mix it to a nice thick batter like we do for dhokla.You can use a whisker for this purpose and also adjust water according to the required consistency.
    • Add ground ginger-chili paste,cumin powder,garam masala powder,sesame seeds, crushed peanuts, chopped coriander leaves, oil and lemon juice to it and mix nicely.

    • Grease big steel plates (with side walls) with oil which fits into your steamer or pressure cooker.Pour the mixture upto 3/4th height of it and steam it in steamer or in pressure cooker without whistle for 15 mins.You can alternatively microwave the mixture in a microwave safe bowl for 3-4 mins until its done.Cool them completely.

    • Cut into desired shapes like squares or diamonds and shallow fry them or deep fry in oil until its golden brown in color.
    Serve them hot with Tomato sauce/Green chutney/coconut-peanut chutney/dry garlic chutney.
    kothmbir vadi

    kothmbir vadi

    Notes:
    1. You can even skip the steaming part and keep stirring the prepared batter over low-medium flame until the mixture becomes and leaves the edges.This process easily takes 20-30 mins.Spread it on a greased plate(with wall) upto 1/2" height and let it cool completely and proceed further.
    2. The addition of peanuts is optional,as I said peanuts are added in the version we get in shops.But I recommend to use them in the recipe.
    kothmbir vadi

    Dill Leaves Stir Fry | Shepuchi Bhaji | Sabsige Soppu Palya

    $
    0
    0
    dill leaves stir fry
    I use various varieties of greens- green/red amaranth, methi, palak and dill leaves regularly in my cooking and I make it a point to use them at least 3-4 times a week to pair with my Jowar bhakris.I prepare either stir fry or dal with red and green amaranth but methi and palak are very versatile greens and can be used for various preparations-snacks,dal,stir fry,curries,gravies,rotis,parathas etc. However, if I want to serve the greens with bhakris,I prefer it in the form of either a simple stir fry or Saag.
    sabsige soppu palya
    This is a typical Maharasthrian style preparation of greens,you can adapt this recipe to prepare any greens stir fry.It is called as 'Shepuchi Bhaji' in Marathi.Usually Maharashtrians do not add any tempering in the greens and keep the garlic to dominate the flavor in the stir fry.I just love this simple stir fry to pair with bhakris or hot phulkas.Dill leaves are good for new mothers as it is known to aid lactation.
    'Shepu' is basically Dill leaves,which is also known as 'Sabsige Soppu' and is widely available in Karnataka and Maharasthra regions.It has a distinct flavor,smell and taste, not many like the taste of it.Even I was not a fan of these greens during my childhood but now after marriage I started liking it.As it is available easily here in Mumbai I included it often in my menu and surprisingly hubby dear never complained about it and he too started liking these greens.Today I am posting a very simple stir fry recipe with these greens.If you are interested you can even check my Dill-Dal Stir fry which is how my mom used to prepare where the dill leaves are cooked with toor dal and is later prepared like a stir fry.

    Check out few greens recipes in my blog:
    shepu bhaji

    Dill leaves Stir fry | Shepuchi Bhaji Recipe:
    Serves 2-3
    Preparation time: 15 mins | Cooking time: 20 mins | Total time: 35 mins
    Cuisine: Maharasthra - Indian | Category: Side dish for Rice/Roti

    Ingredients:
    1 big bunch Dill leaves/Sabsige Soppu/Shepu
    1 big Onion,roughly chopped
    4-5 Green chillies,chopped
    5-6 Garlic pods
    2 tbsp Oil
    Salt to taste

    Method:
    • Clean the dill leaves and wash them properly and chop the leaves finely along with tender stalks.
    • Heat oil in a kadai and add chopped garlic and fry until they turn slight brown in color.
    • Add chopped onions and green chillies and fry for few mins until onions turn pink.
    • Now add the chopped dill leaves and fry for 10-12 mins until the greens are cooked.Take care that you would not over cook the greens,they taste best when they are cooked right.You can initially cover it slightly for 2-3 mins and then remove it later and fry it with out lid.
    Serve it hot with Roti/Rice/Jowar Bhakri/Bajra Bhakri.

    Notes:
    1. You can use green amaranth leaves or red amaranth leaves or spinach or methi leaves and follow the same process.
    2. I usually do not add any seasonings in the oil as I like the garlic flavor to dominate in the recipe.You can reduce the garlic if you are not a big fan of it.
    3. I like to keep this recipe simple as it tastes best as it is and I love to eat this with Jowar or Bajra Bhakris.
    4. Use only tender stems of the greens for this recipe.Chop them roughly.
    5. You can add soaked moong dal after you fry onions and cook it together with the dill leaves.Make sure the moong dal is cooked properly but it should hold its shape and not become mushy.
    6. You can even add grated coconut at the end.
    shepuchi bhaji
    Technorati Tags:  , ,

    Spicy Alu Poli | Pallem Obbattu | Kharada Holige | Kaaram Bobbatlu

    $
    0
    0
    spicy alu holige
    Its been a long time I posted any of our community special recipes and today I am posting a delicious breakfast recipe called 'Pallem Obbatu' which can also be called as 'Palyada Holige' or 'Spicy Alu Poli'. It is basically a south Indian way of preparing Alu paratha where the dough and the filling is prepared in a typical south Indian traditional way.The taste,texture and the final look of this Alu poli is quite different from the regular Alu paratha.The filling is a simple alu palya like how we prepare for masala dosa where as the outer dough is prepared as the same way we prepare for holiges,also it is patted with hand instead of the usual process of rolling the parathas.These Alu polis are extremely soft and tastes best when served hot with spicy coconut chutney.
    spicy alu holige


    pallem obbattu

    If you are interested, check out few more breakfast varieties of our community style recipes here:

    pallem obbattu

    spicy alu poli

    Spicy Alu Poli | Pallem Obbattu | Karam Bobbatlu | Khara Holige Recipe:
    Yields: 8-9 Polis
    Prep time: 30 mins | Cooking time: 30 mins | Total time: 1hr + 1 hr resting time
    Cuisine: Karnataka -Indian | Category: Breakfast

    Ingredients:
    Ghee/oil, to fry poli

    for outer layer/dough:
    1 cup fine chiroti rava  or Flour(Maida)
    a pinch of Turmeric powder,optional
    a pinch of Salt
    1 1/2 tsp ghee, melted
    1/3 cup Oil, to soak the dough
    Water, to mix the dough

    for spicy potato filling:
    2 large Potatoes,boiled and peeled
    1 medium Onion chopped
    3-4 Green chillies,slitted
    1/4 tsp Turmeric powder
    1 tbsp Chana dal
    1 tsp Urad dal
    1/2 tsp Mustard seeds
    2 tbsp Coriander leaves,chopped
    8-10 Curry leaves,chopped
    Salt to taste

    Method:
    for filling:
    • Mash the boiled potatoes and keep it aside.
    • Heat oil in a pan,crackle mustard seeds and fry chana dal,urad dal till brown.
    • Add slitted green chillies,curry leaves and onions and fry until they turn pinkish in color.
    • Add haldi,salt and mashed potato to it and give a nice stir and cook it for a couple of minutes.
    • Add coriander to it and mix properly and keep it aside to cool down.
    • Divide the mixture into 8-10 portions and prepare big lemon sized balls out of it.
    for outer layer/Dough:
    • Mix chiroti rava or flour(maida) with a pinch of salt,turmeric powder and ghee and add water to it and knead in to a very smooth dough. The consistency of the dough should be very loose than the regular roti dough, this is the most important step otherwise you will not get softer polis.
    • Now using your fist hit the dough for few mins to get the softer dough or lift the dough and drop it hard into the bowl and repeat it until the dough becomes very smooth.
    • Now place this dough in a deep vessel and pour oil over it until the dough is completely soaked in oil. Let the dough rest for a minimum of 1 hr and upto 2 hrs. Drain the excess oil and use it for other purpose. 

    to prepare spicy alu Poli:
    • Cut the holige paper into a round and place it on the rolling stone which we use to roll rotis. Grease holige paper or banana leaf with oil.
    • Pinch a small amla sized dough(the amount of dough should be half the quantity of the filling you take) and flatten it a bit using your hands as shown in the pics and place one ball of filling and seal it properly from all the edges like how we do for parathas.Now flatten it slowly with hands to get 5" diameter circle. Alternatively you can roll it like parathas like how we do in between two greased transparent sheets. Adapt the method which ever is convenient for you.
    • Now place the holige paper along with the poli(with poli facing down the tawa)on a hot tawa over the low flame.
    • Let it sit for 20-30 seconds and now peel the holige paper gently scraping it along the edges using a spatula. See the pics to get a clear understanding of it. 
    • Now fry it on both sides applying ghee/oil until light golden in color. Pour the ghee/oil over it, do not try to spread ghee over the poli while frying it. Do not fry it for long time, it will make the polis bit hard so quickly remove it from stove when you get to see the brown patches on it.
    • Repeat the process for making all polis, smear the holige paper liberally with oil and follow the same procedure. 
    Serve the spicy Alu poli/karam bobbatlu hot with coconut chutney.
    kharada holige

    kharada holige

    Notes:
    1. The amount of dough should be half the quantity of filling for each poli otherwise the dough would be more and makes the polis bland and hard at the edges as the dough gets accumulated in the edges.
    2. You can either pat it or roll it like parathas in between two greased polythene sheets.
    3. If you want a less calorie version, do not soak the dough in oil and instead smear oil on top of the dough and let it rest and then roll the alu polis like we do for parathas by sprinkling some flour. But these are not soft as compared to the ones which are prepared by dunking the dough in oil. But it tastes delicious too.
    4. I use holige paper or the plastic banana leaf which we get in markets. If you do not get them use a banana leaf instead.
    pallem obbattu

    Brahmi Tambuli | Ondelaga Tambli Recipe

    $
    0
    0
    brahmi tambuli
    'Brahmi' has lots of medicinal properties and it is said that it increases the memory power among kids. It is called as 'Saraswati aku' in Telugu and my mom uses these leaves occasionally to prepare chutney. I have not tasted it before as we never had a chance to get these leaves at the place where we stayed. During my last visit to Bangalore my mom had got those leaves for me as I wanted to attempt the Tambuli recipe from a long time.One of my kanndiga friend had introduced me to Menthya Tambuli and I followed a similar process to prepare Brahmi tambuli.Brahmi Tambuli is very easy to prepare and is similar to prepare any chutney but with curd in it.It is served cold and it pairs up beautifully with hot steamed rice and is good during hot summers.I would share the Brahmi chutney recipe, which my mom prepares some other time.
    brahmi tambuli

    Brahmi Tambuli | Saraswati aku Tambli Recipe:
    Serves 2-3
    Prep time: 5 mins | Cooking time: 5 mins | Total time: 10 mins
    Cuisine: Karnataka | Category: Side dish for Rice/Accompaniments

    Ingredients:
    1/2 cup Brahmi leaves
    1 cup Curd,nicely beaten
    1/3 cup Coconut,grated
    1 tsp Cumin seeds
    3-4 Green chillies
    3-4 Curry leaves
    1 Red chili
    a pinch of Asafoetida
    1/2 tsp Mustard seeds
    2 tsp Oil
    Salt to taste

    Method:
    • Heat a tsp of oil and slightly fry the brahmi leaves until they wilt.You can skip this step and use the leaves directly.
    • Blend Brahmi leaves with grated coconut,cumin seeds,salt and green chillies to a fine paste.
    • Beat curd nicely and add little water to thin it out.Add the chutney and mix nicely until it is nicely incorporated.
    • Heat a tsp of oil in a small tadka pan and crackle mustard seeds,asafoetida,red chili and add curry leaves and fry for a minute and add the tempering to the tambuli.Refrigerate it for 1-2 hrs.
    Serve it cold with hot steamed rice,pickle,papad and curd chillies.

    Notes:
    • You can follow the same process with Doddapatre leaves.You need to fry the leaves a bit and then blend with the remaining ingredients.
    • You can blend the brahmi leaves directly with other ingredients but I prefered to saute the leaves slightly.
    brahmi tambuli

    Viewing all 520 articles
    Browse latest View live