Quantcast
Channel: THE CHEF and HER KITCHEN
Viewing all 520 articles
Browse latest View live

Vangi Poha | Vangi Pohe | Poha Recipes

$
0
0
vangi poha
Did you ever imagine poha recipe with eggplants(brinjals)? Never right ? and even I never thought of it until I found it in a menu of small but famous breakfast joint called 'Prakash' in Mumbai.It is our favorite breakfast joint and there we would get typical Maharashtrian fare like Sabudana Vada, Kothimeer Vadi, Batata Vada, Thalipeeth, Misal, Batata Poha, Khichdi, Vatana Pattice, Sheera, Piyush etc.We have visited this place many times and have tried almost everything on their menu and we do not miss to visit this place if we have guests over to let them taste the typical Maharasthrian fare.
'Batata Poha' and 'Kanda Poha' are quite common and easily available in breakfast joints in Mumbai.But when I found Vangi Pohe in their menu I could not stop myself from trying it immediately and liked it for its different taste.'Vangi' in marathi means 'Eggplants' and this poha is prepared using eggplants.
vangi poha
I have tried to recreate the Vangi Poha with my own South Indian touch by adding the Vangibath powder which is quite essential to bring the real vangibath taste.However if you do not have vangibath powder you can give a try with goda masala,though I would not suggest garam masala but it is the last option to use if you do not have vangibath powder or goda masala at hand.I absolutely love this recipe and have prepared many times.
Check out other similar recipes - Vangibath | Brinjal Rice and Rava Vangibath in my blog.

vangi pohe

Vangi Poha(Vangi Pohe) | Eggplant Poha Recipe:
Serves 2
Prep time:10 mins+soaking time | Cooking time:20 mins | Total time: 30 mins
Cuisine: Indian | Category : Breakfast/Snacks

Ingredients:
2 cups Poha(flattened Rice/atukulu)
2 meidum long purple Brinjals,cut into small cubes
1 large Onion,thinly sliced
2-3 tbsp Peanuts,roasted and skinned
5-6 Green Chillies,slit
1 tsp Cumin seeds
1/2 tsp Mustard seeds
1/4 tsp Turmeric powder
8-10 Curry leaves
2 tbsp grated fresh Coconut(optional)
2 tbsp chopped Coriander
juice of 1 small Lemon
1/2 tsp Sugar
2 tbsp oil
Salt to taste

Method:
  • Wash and soak poha in enough water(just add up to the level of poha) for 8-10 mins.As I have a slight medium thick variety it did not take much time.If you are using thick variety soak it with little more water and also for long time,say 15-20 mins.
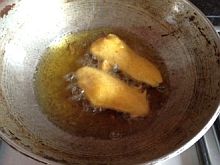
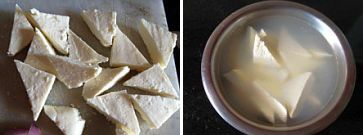
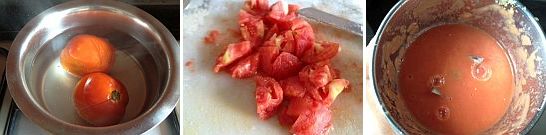
  • Chop the brinjals into fine cubes and let them immerse in water until its usage.This will remove the bitterness of brinjals if any and also would not let them change their color.
  • Heat oil and crackle mustard seeds and cumin seeds.Add ground nuts and fry until they turn red and slightly crisp.
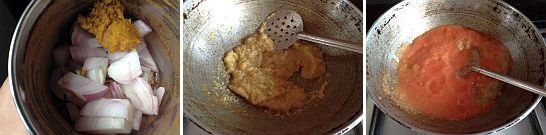
  • Add cut green chillies,curry leaves and fry for a minute,add sliced onions and fry until they are crisp and pink.
  • Add cubed brinjal pieces and fry well for 2-3 mins.Cover it and cook for 6-8 mins by stirring it in between until it is cooked completely.
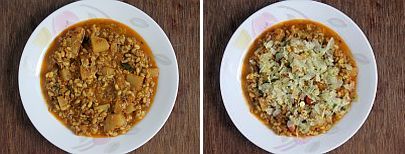
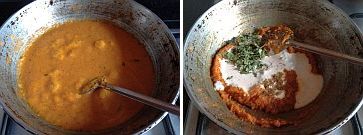
  • Add sugar,turmeric powder,salt,vangibath powder and cook it covered for a minute.
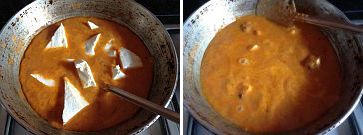
  • Add soaked poha and give a good stir until everything is mixed properly.
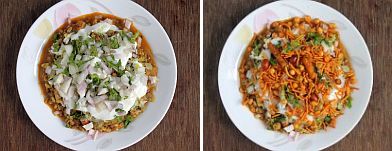
  • Add lemon juice,grated coconut(I did not use as I did not have) and chopped coriander just before removing from stove and mix well.
Serve it hot with chips/sev/chiwda/sliced cucumber and lemon wedges with a cup of tea.

vangi poha

Notes:
  1. You can use small variety brinjals too ,use 4-5 small brinjals.
  2. The addition of vangibath powder adds a nice taste,do not add it in excess too.If you do not have vangibath powder add either 1/2 tsp goda masala or 1/4 tsp garam masala to the recipe.
vangi pohe

Check out other Poha varieties for breakfast.
poha recipe

Onion Tomato Raita | Easy Raita Recipes

$
0
0
tomato onion raita
Onion-Tomato Raita is the most common raita served with Pulaos and Biriyani.When I prepare south Indian style pulao or rice variety, I usually prepare the raita in south Indian style-with the addition of grated coconut.While the basic raita is just a mix of finely chopped vegetables with whisked curd and salt,one can get creative and prepare various vegetable raitas.Apart from Onion-Tomato raita, the most common raita varieties would be Aloo raita and Boondi raita.You can prepare raitas with the vegetables like grated beetroot or carrot or bottle gourd which tastes different from the regular ones or you can use greens like palak or mint for a healthy version of raita.You can even add few varieties of fruits like pomogrenates,grapes and pine apple to raitas,check out the recipe for Anardana raita if you are interested.
I prefer my raitas to be more thick and creamy as I am not fond of the watery and sour ones.Though the recipe is simple I would suggest you to go through notes where I have mentioned some tips for a good and delicious raita.

onion tomato raita

Onion-Tomato Raita Recipe:
Serves 2
Preparation time: 5 mins | Cooking time: nil | Total time:5 mins
Recipe Cuisine: Indian | Category: Accompaniments 

Ingredients:
1 cup thick fresh Curd
1 large Onion,finely chopped
1 large Tomato,finely chopped
2 Green chillies,finely chopped
2 tbsp chopped Coriander leaves
1/4 tsp roasted Cumin powder(optional)
Salt to taste

Method:
  • Whisk curds with a wire whisk until smooth.
  • Add salt and cumin powder to it and mix well.
  • Add the chopped ingredients to the beaten curd and chill it until it is served.

onion tomato raita
Notes:
  1. I like my raita really thick,if you want you can add some water to the raita to make it thin.
  2. If your curd tastes sour add 1 tsp sugar and beat it nicely.It will reduce the sourness.
  3. If you want to prepare the raita ahead,do all the chopping work and keep them ready and mix it just before serving.This way the raita would not become watery.You can even sprinkle some salt on the onions and leave it for some time,remove the extra water by squeezing and add then mix with curd and can be refrigerated until its use,this way the raita will not become watery.
  4. You can add chopped cucumber in the recipe along with onions and tomatoes.
  5. Replace coriander leaves with mint leaves for a refreshing taste.
  6. For a south Indian version add a handful of grated coconut in the recipe.
onion tomato raita

Bombay Masala Toast Sandwich | Potato stuffed Sandwich Recipe

$
0
0
bombay toast sandwich 
Mumbai street food has its own variety ranging from the humble vada pav to  pakoras, sandwiches, pani puri, bhel puri and various other chaats,variety dosas, Indo-Chinese items. Few varieties really stand out and one such is this famous Bombay Toast Sandwich also called as Masala Toast Sandwich widely known as Aloo Toast ot Potato Sandwich in rest of the country.
bombay toast sandwich
You would find sandwich stalls in each and every corner of the city where the hawkers would be busy preparing the fresh sandwiches through out the day.These sandwiches can be eaten as a snack or a meal by itself.I usually rely on these sandwiches if I go out for shopping.As the vegetables are freshly cut and everything is laid in front of you, one doesn't need to bother much about hygiene.The addition of liberal amount of amul butter makes these sandwiches taste even more delicious.If you have not tried this sandwich earlier,I would strongly recommend to try this sandwich recipe.It is really delicious and makes a perfect Breakfast or Snack.
potato stuffed sandwich
I have posted Bombay style Veg toast sandwich earlier which tastes equally good.That version  though is prepared mostly with vegetables where as today's version has the aloo masala along with the vegetables which makes a wholesome breakfast.
potato stuffed sandwich

Bombay Toast Sandwich | Mumbai Masala Toast | Potato Toast Recipe:
serves 2
Prep time:10 mins | Cooking time: 5 mins | Total time:15 mins
Cuisine:Indian | Category:Breakfast|Snacks

Ingredients:
8 Whole wheat Bread slices or regular sandwich bread
1 cup Potato curry(recipe follows)
1 Capsicum,de seeded and thinly sliced rounds
1 Onion,thinly sliced rounds
1 Tomato,thinly sliced rounds
1/4 cup Green Chutney
1 tsp Chaat masala or Sandwich masala
Salt to taste
Amul Butter
Sev,to top

for Potato stuffing:
2 large Potatoes,boiled
1/3 cup boiled fresh/frozen Green Peas
1 medium Onion ,finely chopped
2-3 Green chillies,chopped fine
1 tsp Green chili-Ginger paste
1 tsp Chat masala
1/4 tsp Turmeric powder
1/2 tsp Cumin seeds
1/2 tsp Mustard seeds
2 tbsp Coriander leaves,finely chopped
8-10 Curry leaves,finely chopped
salt to taste
2 tsp Oil

Method:
to prepare potato stuffing:
  • Mash the peeled and boiled potatoes and keep it aside.
  • Heat oil in a pan,crackle mustard seeds and cumin seed.
  • Add chopped green chillies,curry leaves and onions and fry until they turn pinkish in color.
  • Add green chilli-ginger paste,boiled fresh/frozen peas and fry well.
  • Add turmeric,salt and mashed potato to it and give a nice stir and cook it for a couple of minutes.Add a couple of tbsp of water to it and cook to get semi soft consistency curry.
  • Add chat masala and coriander to it and mix properly and keep it aside to cool down.
to prepare sandwich:
  • Apply butter on one side of bread slices.
  • Apply green chutney on the same side of all the bread slices to which we applied butter.
  • Apply a thick layer of potato stuffing uniformly using a butter knife,level the stuffing over the bread.
  • Arrange the thinly sliced vegetables(tomato,onion,capsicum) on the stuffing and sprinkle salt and chaat masala (or sandwich masala) over it.
  • Apply butter on the outer slice facing upwards and place it on the hot grill(upside down so that the buttered bread slice would be towards the grill).Now apply butter on the top slice and close the grill and let it grill until the bread becomes crisp and golden brown in color.
  • Remove the sandwich on to a plate and apply some butter(optional) on top of it.
  • Cut it into half in Triangle shaped Toast or else it can be cut into 4 pieces.
  • For a typical Bombay style Chat sandwich,spread some green chutney over the buttered toast sandwich and sprinkle some chaat masala and add sev generously over it and serve immediately.
Serve the toast hot with the Tomato ketchup and Green Chutney.

mumbai masala toast sandwich
Notes:
  1. We get good variety of ready made sandwich masala  in Mumbai.If you do not have use chaat masala instead.
  2. You can avoid vegetables and just use potato stuffing for the sandwich.
  3. You can avoid potato stuffing and use all vegetables like sliced cucumbers, tomato, capsicum, onions, boiled sliced potatoes, beetroots to make vegetable sandwich.
  4. I prefer to use Amul salted butter for this sandwich,try to use it if you do not get it use any other butter.
  5. If you do not have griller roast the sandwich on tawa ,slightly press the sandwich while roasting so that the masala sticks to the sandwich.
  6. For Cheese masala toast add grated cheese generously over the vegetable mixture and grill it.
bombay toast sandwich
Check out the crispy bread outside and soft and melting filling inside.If you add cheese it would be a double treat to the taste buds.
potato toast sandwich

Cabbage Muthia | Gujarati Snacks Recipes

$
0
0
cabbage muthia
My knowledge of Gujarati Cuisine was limited to only few varieties like Dhoklas , fafdas, khakras etc before marriage.I got a better exposure of Gujarati cuisine after shifting to Mumbai.There are numerous Gujarati restaurants and farsaan shops and I always manage to find something new every time I visit.Now I am completely in love with the Gujarati food ranging from their snacks like dhoklas, khandvi, pankis, theplas etc to the full fledged thali.
cabbage muthia
I was introduced to muthia by a friend after my marriage and she prepared lauki muthia in a microwave and I am hooked to it's taste from that time. I have posted a version of Muthia - Mooli Muthia,which is a healthy version using jowar flour and today I am posting the recipe of Cabbage Muthia which is prepared in a traditional way.
cabbage muthia
Muthias are steamed dumplings which is a good low fat snack which can be served at breakfast time or can be served as a tea time snack.I usually prepare them in large quantities and store them in refrigerator for 2-3 days and prepare the snack with it whenever required.I sometimes saute or shallow fry the muthias and add to the tomato- onion gravy to make a nice side dish or I also use them in kadhis.They taste nice in any of the forms.
Check out Cabbage Pakora recipe if you are interested.
cabbage muthia

Cabbage Muthia Recipe:
Serves 2
Preparation time: 15 mins | Cooking time: 20 mins | Total time: 35 mins + cooling time
Recipe Cuisine: Gujarati - Indian | Category: Snacks

Ingredients:
2 cups grated Cabbage
1/2 cup Besan(Chickpea flour)
2 tbsp Whole wheat flour
1 tsp Green chili paste
1 tsp grated Ginger
1 tsp Carom seeds(ajwain,optional)
2 tsp Kasuri methi
1/2 tsp Cumin seeds
1/4 tsp Turmeric powder
a pinch of Lemon Salt(citric acid)
a pinch of Cooking soda(optional)
1 tbsp Oil
1/2 tsp Sugar
Salt to taste

for Tadka:
1 tbsp Oil
2 Red Chilies broken
1 tsp Sesame seeds
1/2 tsp Mustard seeds
2-3 Green chillies,slit
few Curry leaves
Coriander leaves,to garnish

Method:
  • Take the grated cabbage in a bowl. Add all the rest of the ingredients(except the ingredients for tadka) and mix until it forms a very soft dough like texture.The water from cabbage would be enough to make the dough,if you need you can sprinkle some water to make it to a smooth dough,softer than the roti dough.If your dough becomes very soft add a couple of tbsp of besan to it and mix well.
  • Make small oblong balls with the dough and place them on a greased steamer and steam them for about 20 mins.
  • To check it whether its done use the toothpick method.Just prick them with the tooth pick,if it comes out clean then it is done otherwise it needs to be cooked for longer time.
  • Let them cool completely. Cut them into bite sized pieces and keep them ready for the tadka.
  • Heat oil in a nonstick pan and crackle mustard seeds.Add the slit green chillies,red chilies and fry them together.Add curry leaves and sesame seeds and let them splutter.
  • Once the seeds start to splutter add the cut dumplings and reduce the flame to low and toast them for about 7-8 mins stirring often so that all sides gets crispy.
  • Garnish with Coriander leaves.I did not use it,actually I forgot it.You can even add grated coconut for garnish if you want.
Serve them hot/warm with Green chutney and Meetha Chutney.

cabbage muthia
Notes:
  • Prepare the mixture before you are ready to steam otherwise the dough will leave water if kept for long time.If the mixture becomes too soft add some more chickpea flour to it.You can even add a tbsp of fine rawa to the mixture.
  • You can store the muthia in refrigerator for 2-3 days and can temper when needed.
  • I add a pinch of cooking soda as it will make the muthia soft and fluffy.You can even use 1/2 tsp eno(fruit salt) instead of  cooking soda.It is entirely optional.
  • I add carom seeds when I prepare anything with chickpea flour as it will yield in easy digestion.You can skip if you want.
Variations:
  • You can use finely shredded radish or grated bottle gourd or grated zucchini instead of grated cabbage and follow the same process.
  • You can also use jowar flour instead of besan(chickpea flour) for a healthy option.
  • You can replace kasuri methi with the freshly chopped fenugreek leaves.
cabbage muthia

Aratikaya Bajji | Raw Banana Pakoras

$
0
0
aratikaya bajji
Monsoons are tempting me to make fried pakoras (fritters) often these days. Well , am not sure if I should be blaming the weather or the temptation to make something interesting that I could post. This is more so becoming an excuse for me to indulge in such fatty deep fried goodies that I usually avoid preparing more than once in an month. TH is the one who initiates me to make some of his favorite deep fried goodies at times. These dishes include Puri, Batura or various kinds of fritters (Pakora).I must say that TH was elated at being served deep fried goodies on two consecutive weekends and that too without pushing me to prepare it.
balekai bajji
In South India, there is a slight difference between Bajjis and Pakoras.If the vegetables are dipped in batter and deep fried then it is known as Bajjis and if its prepared with the mixture of cut vegetables like onions or cabbage and mixed with besan (chick pea flour) mixture and deep fried then it is called as Pakoras.In North India, any vegetable mixed with Besan mixture and deep fried in any form is called Pakora.One can prepare various Bajji varieties by using any vegetable but the most common one's are Onion Bajji, Potato Bajji, Capsicum Bajji, Mirch Bajji and Raw Banana Bajji.In South India, in few stalls they even cut these Bajjis in the centre and stuff it with a mixture of onions,coriander,salt and lemon juice. Try it once, you will like it a lot..
raw plantain pakora
In the monsoon season, apart from Pakoras even hot bondas and Vadas are equally relished. In fact at my mom's place, we prefer bonda and vada over Pakoras and Bajjis and of course there are few exceptions like Mirch Bajji.My mom mostly prepares bondas with either rice flour or sago or the left over dosa batter.
plantain fritters
While Pakoras, Bajjis, Bondas and Vadas are not healthy options as they are deep fried, I don't mind consuming them once in a while.In case you are a health freak and want to avoid these deep fried goodies and opt for something light and healthy, I would suggest that you check out a few Cutlet and Tikki recipes in my blog - Vegetable Chops , Zucchini Patties,Maggi Noodle Cutlet , Sago(Sabudana)Tikki, Broccoli Cutlets and Hara Bhara Kebabs.
raw banana pakoras

Aratikaya(Kela)Bajji | Raw Plantain Pakoras Recipe:
Serves 2-3
Prep time:10 mins | Cooking time:20 mins | Total time:30 mins
Cuisine: Indian | Category: Snacks

Ingredients:
2-3 Raw Bananas(Raw Plantains)
Oil,to deep fry

for Batter:
1 cup Besan/Chickpea flour
1/4 cup Rice flour
1 tsp Red chilli powder
a pinch of Turmeric powder
1/4 tsp Garam masala (optional)
1/2 tsp Carom seeds
a pinch of Cooking soda
2 tsp hot Oil
Salt to taste

Method:
  • Peel the skin of plantains and slice lengthwise into thin pieces or you can use a slicer to do this work.I have an adjustable slicer and hence I can make slightly thick pieces.Drop them in water until its usage so that they would not loose their color.Do not slice them very thin like we do for chips,slice them of medium thickness so that they will hold the batter when we dip in the pakora batter.
  • Mix all the items(mentioned under 'for Batter') well and make it into a smooth paste by adding enough water.Add the water slowly and use a wire whisk and whisk to the consistency of thick idly batter consistency and make sure you don't add too much water at once.The more you beat the mixture the better and fluffy the pakoras would be.You should ideally beat the batter for 3-4 mins.
pakora batter
  • Mean while heat oil for deep frying.
  • Hold the edges of plantain slices and dip each of them in batter and individually and drop them slowly into hot oil and deep fry them till it becomes golden brown in color on medium flame.
  • Drain them on to a kitchen towel to remove excess oil.
Serve them hot with Imli Chutney/Green Chutney/Tomato Sauce.
You can even top them with a mixture of finely chopped onions,coriander leaves,salt and lemon juice like they serve in Bajji stalls in South India.

raw banana pakora
Notes:
  1. You can use the same process for making pakoras like Cauliflower, Baby corns, Broccoli and Poblano peppers(remove the seeds) by blanching them in hot water initially and follow the same process.
  2. You can use the same batter as base for all pakora varieties like Potato(cut into thin slices), Brinjal(cut into thin slices), Onion(thin round slices as well as lengthwise) and Capsicum rings.
  3. The addition of garam masala is completely optional,as plantain is a bland vegetable I added it to spice up the batter.
  4. The addition of rice flour makes the pakoras crisp.
  5. I like to add hot oil to the batter mixture as it will make the pakoras crisp and also makes them consume less oil.Make sure you beat the batter which will makes the pakoras more fluffy.
balekai bonda

Cup Corn Recipe | Sweet Corn Recipes

$
0
0
cup corn
Monsoons are here and is the right season for fresh corn and sweet corn varieties.I absolutely love the corn roasted on the charcoal and liberally sprinkled with salt,chili powder and lemon juice.It is an absolute treat in this rainy season to eat hot corn.While I prefer the charcoal grilled corn TH prefers  boiled corn.Hence I end up making both the types to balance the taste buds.I am not a fan of frozen sweet corn and love to use the fresh corn always.
buttered cup corn
We find these steamed corn stalls in malls,theatres,markets and many public places.We get various kind of flavors in it ranging from Indian,Mexican,Italian,Thai etc.The most classic one is a plain steamed corn with butter,salt and pepper which tastes absolutely delicious.However I like to jazz it up with Indian flavors and I hence I love to add Chaat masala to my cup corn.This is a basic recipe and you can improvise it according to your requirements.

Check out other Corn Recipes here.

cup corn chaat 
Buttered Cup Corn Recipe:
Serves 2
Prep time:5 mins | Cooking time:20 mins | Total time:25 mins
Cuisine:Indian | Category:Snacks

Ingredients:
2 Sweet corns on the cobs
1 tbsp Butter
1/4 tsp Pepper powder,freshly ground
1/2 tsp Chaat masala
juice of 1 small Lemon
Salt to taste

Method:
  • Remove the kernels from the fresh corn.I usually cut one line of corn vertically with the knife,you can easily peel the other corn kernels using the knife by running it in the line.Alternatively you can just cut them using the knife or use frozen sweet corn.
  • Add salt and water to it and pressure cook for 3-4 whistles until the corn becomes slightly soft,alternatively you can cook it in microwave for 6-7 mins.
  • Once the pressure subsides drain the excess water and when it is still hot add butter to it and mix well.The butter melts immediately and coats the corn nicely.
  • Add pepper powder,chaat masala,salt and lemon juice and mix well.As chaat masala and butter already has salt,so add less salt.Taste it and adjust the seasoning according to your wish.
Serve it hot as a snack or a side to your meal.

cup corn 
Notes:
  1. You can add chopped coriander leaves to the cup corn if you want.
  2. You can play with the spices used in the cup corn.You can used mixed herbs or roasted cumin powder or red chili flakes or smoked paprika if you wish.
  3. If you like cheese you can add 2-3 tbsp grated cheese and mix and then microwave it for a minute.This is ideal for kids.
  4. You can add finely chopped tomato,onion and coriander to the above recipe and prepare corn salad.
cup corn chaat

Monsoon Special Snacks Recipes

$
0
0
Monsoon season presents a great opportunity to have snacks;the same snacks that would have made you feel guilty in any another season. I am highlighting a collection of a few snacks such as Pakoras, Vadas, Bondas, Samosas, Cutlets, Chaats, hot light meals and some low cal snacks which you can prepare in the monsoon season and ENJOY!!!
For a complete list of Snacks,please refer here.

                 
    Raw Banana Bajji               Babycorn Pakora                 Cabbage Pakora

                   
    Broccoli Tikki                     Sago Tikkis                         Bengali Veg Chops

                  
   Bombay Toast                  Cabbage  Muthia                   Cup Corn Chaat
                
   Oats Paniyaram                  Chilli Parotta                            Onion Samosa

                 
    Misal Pav                           Matar Kachori                       Bhurj Pav

             
   Oven-roasted Chickpeas      Spicy Phool Makhana        Moongdal Corn Dhokla
 
                  
   Masala Cocktail Idlis             Tandoori Aloo                       Punugulu

                 
    Canape Sev Puri                  Tikki Puri                              Nippat Masala

                  
    Italian Corn Canapes             Aloo Chana Chaat                 Murmura Chaat

                    
    Kala Chana Sundal              Sweet Corn Sundal                Groundnut Sundal

               
    Sago Bonda                            Mixed Dal Vada                      Mooli Muthia

                 
    Khara Buns                        Bangarpet Pani Puri              Maggi Noodle Cutlet

               
    Besan ka Cheela                 Bread Besan Toast                 Garlic Bread Exotica

             
    Hara Bhara Kebab              Iyengar Bakery Toast                   Ragada Patties

Also Check out other few favorite Snack recipes for the Monsoons:
 For a complete list of Snacks,please refer here.


Misal Pav Recipe | Maharasthrian Misal Pav

$
0
0
misal pav
I have mentioned about our love for Maharasthrian food in a few of my posts earlier.I was never aware of the vast variety of Maharasthrian recipes until I shifted to Mumbai.Over a period of time I learnt a few recipes from friends which I have made several times now.Among those recipes,Misal Pav is one of them, which we relish thoroughly. I prepare this quite regularly at home for either dinner or breakfast.I am sure even if you are tasting it for the first time you will definitely like it.We like Pav based recipes like Pav bhaji, Bhurji Pav, Vada(or Tikki) Pav, Masala Pav, Misal Pav as I feel half the work is reduced by using the Pav as the base.
misal pav
Misal Pav is prepared with few variations in different places in Maharashtra like Puneri Misal, Kolhapuri Misal etc.Though I have not tasted all the versions but I would love to try them when I visit those places.There are also a few variations in the way they serve misal pav, while a few serve Usal and Kat(Tarri), a spicy gravy separately with pav others serve a gravy kind of misal and top it with farsan and other ingredients.Both the variants taste nice but I love the version where we serve the spicy gravy called 'Kat(Tarri)' as I love to dunk pav in that spicy broth and eat the misal.
'Misal' is a spicy sprouted bean gravy topped with various farsaan (namkeen), chopped onions and coriander and can be served as it is or with Pav.'Usal' is moth bean curry and when it is made in a slight gravy form and garnished with farsaan and onions it is called 'Misal'.I like to add a layer of Poha chivda and beaten curd along with farsan and onions to make it more tasty,though it is optional.Few versions of Misal has a layer of potato curry but I do not add potato curry as I already add potatoes in my Misal as I feel its an overdose of potatoes.
misal pav
Misal is supposed to be hot, fiery and slightly oily but one can prepare it as per their personal preferences.I make it bit healthy with less spices and oil and also I serve it with wheat pav instead of the regular pav.I usually prepare it for dinner so that we can have the same for breakfast.The process is a bit lengthy but not difficult to prepare.As it makes a complete meal, its worth the effort.
In Mumbai, a few joints serve Misal with pav while the others serve pav only when requested. Usually, they do not roast pav with butter but I love to roast it with a bit of butter to make it a little moist and soft.
misal pav
misal pav
Check out other Maharasthrian recipes in my blog.
maharasthrian misal pav

Maharasthrian Misal Pav Recipe:
Serves:2-3
Prep time:20 mins | Cooking time:30 mins | Total time:50 mins
Cuisine:Maharasthrian-India | Category:Breakfast/Snacks- Light meal

Ingredients:
6 Pav Buns
Butter,to roast Pav

for Matki Usal:
1 1/2 cups Matki(Moth beans) Sprouts,steamed
1 large Potato,boiled and cubed
1 Onion,finely chopped
2 tbsp Spice paste(prepared as below)
1 tsp Kala Masala or Goda Masala or 1/4 tsp Garam masala
1/4 tsp Turmeric powder
1/2 tsp Red chili powder
5-6 Curry leaves
1/2 tsp Mustard seeds
a pinch of Asafoetida
Salt to taste
1.5 tbsp Oil

for Kat/Tarri(thin Gravy):
1 large Onion,chopped
2 Tomatoes,chopped
1/2 cup grated Dry coconut
4-5 Garlic cloves
3/4" Ginger,chopped
1 tsp Red chili powder
1 tsp Coriander powder
1/2 tsp Cumin powder
1/2 tsp Turmeric powder
1 tbspKala Masala or Goda Masala or 1/2 tsp Garam masala
1 tbsp chopped Coriander leaves
1/2 tsp Sugar
2-3 tbsp Oil
Salt to taste
to serve:
1 cup Mixed Farsan
1/2 cup Kanda Poha or Poha Chivda
1/4 cup beaten Curd
2 Onions,finely chopped
1/4 cup chopped Coriander leaves
1 Lemon,cut into small wedges

Method:
to prepare Kat/Tarri(thin Gravy):
how to make kat or tarri for misal
  • Heat 1 tbsp Oil in a pan and add chopped onions and fry until they turn slight golden brown in color.
  • Add garlic and chopped ginger and fry for a couple of minutes.
  • Add grated dry coconut and fry for 3-4 mins until it turns brown,do not burn it.
  • Add chopped tomatoes,coriander and cumin powder and fry until the tomatoes get mashed and form a pulpy mixture.It takes 4-5 mins.Cool the mixture completely and grind to a very smooth paste.Reserve 2 tbsp of this mixture to prepare Usal.
  • Heat 2 tbsp Oil in a kadai and add ground paste and fry again for 2-3 mins and add 3/4 tsp red chili powder,  turmeric powder, kala(or goda masala) and salt and fry for another 3-4 mins.
  • Add 2.5 cups - 3 cups of water and boil it for 8-10 mins until the oil starts floating on top.
  • Add chopped coriander leaves at the end.
  • In a separate small pan heat 1 tsp oil and add 1/4 tsp Red chili powder and sugar and remove it from heat immediately and add this to the kat/tarri gravy,do not mix it.This step is optional but gives the authentic look of oily layer on top.
to prepare Matki Usal:
matki usal recipe
  • to sprout Matki - Wash and soak matki(moth beans) for 6-7 hrs in water and wash it once with fresh water and drain the excess water and tie in a muslin cloth or use a sprout maker to make sprouts.It will take 12-15 hrs.
  • Steam the matki sprouts in cooker with a pinch of salt for 8-10 mins.
  • Heat oil in a kadai/pan and crackle mustard seeds and add asafoetida and curry leaves and fry for half a minute.
  • Add chopped onions and fry until they turn translucent.Add ginger garlic paste and fry until the raw smell goes away.
  • Add 2 tbsp of spice paste as prepared above and saute it for 2 mins.You can skip this step too.
  • Add steamed moth beans and boiled and cubed potatoes and fry for 2 mins.
  • Add turmeric powder, red chili powder, goda(or kala) masala and salt and fry it for another couple of mins.
  • Add 1/4 cup water and cover it and cook for 7-8 mins.The Usal should not be watery but should have slight gravy.
to roast pav:
  • Slice the pav buns and roast it slightly on tawa by applying butter or just warm it with out butter.It is your choice to use butter or not but I recommend it.Do not roast buns for long,just warm them and make sure they stay soft.
to assemble Misal Pav:
  • layer-1 : In a deep plate add 2 ladles of Matki Usal and pour 1 ladle of Tarri/Kat(gravy) on top it.
  • layer-2 : Now add either 3-4 tbsp of Kanda Poha or Poha chivda on top of it evenly and top it with 2-3 tbsp of beaten curds.The addition of poha or chivda and curd is optional,you can skip it if you want but I love it this way.I am lazy to prepare poha with it so I usually add chivda to it.
  • layer-3 : Add a layer of finely chopped onions liberally and coriander leaves.You can squeeze lemon now or serve it in the plate.But do not miss to use the lemon in any case.
  • layer-4:  Add a layer of mixed farsan according to your wish.You can add either mixed namkeen or mixture or ghatiya whatever is available with you.But do not skip this layer.
Serve it hot with roasted buns,a bowl of Kat/Tarri and lemon wedges.
how to eat misal pav - One needs to dip the pav in Kat/Tarri and eat along with the mixed misal. Do not forget to squeeze the lemon into misal and mix nicely.

maharasthrian misal pav

Notes :
  1. Usal can be prepared with mixed sprouts or moong sprouts or sprouted Yellow peas.You need to cook them according to their cooking time.
  2. If you want to make misal quick you can cook everything in the pressure cooker.Follow the same process of making usal in cooker and add ground masala paste(which we prepared for tarri) and add all other masalas and pour enough water and pressure cook for 3 whistles.
  3. Matki Usal can be served with Roti and Bhakri too.
  4. You can serve assembled misal as it is as a chaat with out pav and tarri(kat).
  5. Maharasthrian Kala masala is highly recommended to prepare misal pav,if you do not get it add goda masala or garam masala in the recipe.
  6. Misal is supposed to be spicy ,you can make it less or more spicy according to your requirements.So adjust the masalas accordingly.
maharasthrian misal pav

Ottu Shavige | Home made Rice Noodles(String Hoppers)

$
0
0
akki shavige
Ottu Shavige(Vothu Shavige) or Akki Shavige is a specialty of Karnataka and is also widely prepared in our family.It is a specialty of our community and is prepared on special occasions and functions and also if we have special guests at home.Ottu Shavige of Karnataka is similar to Idiyappam of Tamilnadu though the process is slightly different.In the preparation of Otthu Shavige,rice flour is cooked and made it into cylindrical shaped balls which are then steamed and pressed into thin string hoppers while in the later process(Idiyappam),the flour is mixed to a dough and it is pressed into thin noodles and then they are steamed.Despite using the same ingredients,the resultant product of both the processes taste slightly different and my taste buds always incline towards Ottu Shavige,the one which I am quite familiar with from my childhood.Though we get instant rice noodles in market,the taste of freshly pressed rice noodles is nowhere compared to those instant rice noodles.Though the preparation process is tedious,it is worth the effort.
ottu shavige
Usually Ottu Shavige is prepared on special occasions or if you have some special guests.Preparing Ottu Shavige is quite laborious and needs at least two people to help. I still remember how we used to help our mom when she used to prepare this dish.It is really fun if two or more people do this but it is quite laborious if a single person has to handle it,you need at least two people to prepare this.
ottu shavige
Ottu Shavige is quite versatile and we prepare sweet as well as spicy varieties with it.The usual  sweet side dishes we prepare for Ottu Shavige are Gasgase Payasa(Kayi Halu) or Nootoodi (Sweetened Sesame seed powder) or sweetened Gasgase powder or sweetened Groundnut powder.We can prepare spicy varieties like Lemon Shavige,Tamarind Shavige, Coconut Shavige, Tomato Sevai with Ottu Shavige.Among all,my most favorite is lemon shavige and the combination of ottu shavige with gasgase payasa and sesame powder.
ottu shavige
We need a special Shavige press to prepare Ottu Shavige.The picture below shows how the Shavige Press looks which is used to prepare Otthu Shavige.This machine is quite sturdy with a handle to turn and a perforated cylindrical cup and stands on its legs.
As I do not have this machine in Mumbai I usually ask my mom to prepare this when I visit her.I was able to click few pictures when she prepared last time so that I can share with you all,otherwise I don't think that my favorite recipe would appear in my blog.If you do not have Shavige press you can use the Idiyappam press(murukku press) to prepare this,but I am sure that it would not be easy to prepare Ottu Shavige in the Idiyappam press as the dough is already steamed and needs more energy than usual to rotate the handle.
ottu shavige

Otthu Shavige | Akki Shavige | Home made Rice Noodles Recipe:
Serves 2-3
Prep time:1 hr | Cooking time:45 mins | Total time:1hr 45 mins
Cuisine: Karnataka - South Indian | Category: Breakfast 

Ingredients:
to prepare Akki Ottu Shavige:
3 1/2 cups Water
1 tsp Salt
1 tsp Oil

to prepare Kayi Haalu | Coconut Poppy Seed Payasam:
1 cup grated fresh Coconut
2 tbsp Poppy seeds
6-8 Cashew nuts
1 1/2 cup Milk
1/2 cup Water
1 1/4 cup grated Jaggery
1/4 tsp Cardamom powder

to prepare sweetened sesame powder:
1/2 cup white Sesame seeds
1/2 cup grated Jaggery

to prepare sweetened groundnut powder:
1/2 cup roasted and skinned Groundnuts
1/2 cup grated jaggery 

Method:

to prepare sweetened Groundnut powder:
  • Grind roasted and skinned groundnuts to a powder in the mixie and add grated jaggery to it and run it again to get a uniform mixture.
  • Store it in air tight container.Make this on the previous day itself to ease up the process.
to prepare sweetened Sesame powder:

  • Dry roast sesame seeds over medium flame for 3-4 mins until they smell nice.
  • Grind sesame seeds to a powder in the mixie and add grated jaggery to it and run it again to get a uniform mixture.
  • Store it in air tight container.Make this on the previous day itself to ease up the process.
to prepare Kayi Halu:
  • Grind cashew nuts,poppy seeds,grated coconut and cardamom into a fine paste.
  • Mean while add grated jaggery to 1/2 cup of water and boil until jaggery melts and strain this mixture.
  • Boil the jaggery mixture again and add the ground coconut-poppy seed mixture.Cook it on low flame until it comes to a boil.
  • Add milk and cook for another 2 mins and remove it from the stove.Do not boil for more time as it might curdle.
to prepare Akki Shavige:
ottu shavige
  • Bring water to a boil in a deep pot and add salt and oil to it.
  • When the water is boiling add Home made rice flour in the center of the pot and close the lid to half(do not cover it completely,leave some space for the steam to escape otherwise the water would over flow) and let the flour(which would be floating) cook over low flame for half an hour.
how to make rice noodles
  • Stir vigorously now until you get a lump of mixture formed and all the ingredients are well mixed.You can use a long ladle or your roti belan for this process.
  • Divide the mixture into two parts and knead the mixture into a smooth dough on a silicon baking mat or on a clean plastic sheet.Be careful the dough would be very hot,so wet your hands while doing this process.You can even place the dough in a clean plastic bag and knead well,this is very easy and risk free process.This should take at least 4-5 minutes.It is always better to do in small portions.
how to make rice noodles
  • Make smooth cylindrical shape balls(4" lengthwise) out of the mixture and arrange them in a steamer and steam for 20-25 mins.You can even use cooker to steam them,make sure you remove the whistle while steaming them.
  • Keep the Shavige press ready and grease the inside portion with oil and also keep a plate below the press to collect the freshly pressed noodles.
how to make rice noodles
  • Keep all the balls in the hot box and take out one ball at a time and place it inside the Shavige press and press it to strings of thin noodles.This is a bit laborious process and needs bit strength as it is not easy to rotate the shavige press.You need two people to do this,as one would hold the legs of shavige press and move the plate underneath while pressing the shavige so that noodles would spread out widely and not form a lump and the other person to turn(rotate) the handle of shavige press.Also,take care while doing this process as the dough would be very hot to handle.Drop the noodles(collected on plate) carefully into a big wide vessel and keep the plate back in position to repeat the process.Repeat the process with all the balls to get the noodles.It is important to keep the dough balls in hot box so that they would not turn dry and hard and also it would be easy to press them while they are hot.
how to make rice noodles
Serve the plain Otthu Shavige with Kayi haalu(Sweetened coconut milk) or Sweetened Sesame powder or Sweetened Ground nut powderand ghee.Mix the otthu shavige with ghee and the powders and enjoy the heaven on plate.
You can even use them to prepare Lemon Shavige, Tangy Tamarind Shavige, Coconut Shavige, Tomato Sevai.The recipe for Lemon Shavige recipe would follow soon.
ottu shavige
ottu shavige
Notes:
  1. It is essential to use Home made Rice flour for the recipe,follow this link to know how to prepare home made rice flour.You can alternatively use Idiyappam flour,but you need to follow the instructions for the water measurements as mentioned on the packet.
  2. It is important to keep the dough balls in hot box so that they would not turn dry and hard and also it would be easy to press them while they are hot.
  3. This is a very laborious process and need atleast 2 people to prepare this.So attempt this recipe only if you have any help in the kitchen.
idiyappam

Check out few traditional recipes of my family which are prepared using rice flour.
rice noodles

Moong Dal Corn Dhokla Recipe | Gujarati Snacks

$
0
0
moong dal dhokla
I love Gujarati snacks for the fact that most of them are low calorie recipes. Dhokla falls under that category.There are many versions of Dhokla like Khaman Dhokla, Khatta Dhokla, Sooji Dhokla, Moong dal Dhokla, Corn dhokla, Sandwich Dhokla, Palak Dhokla etc and  I absolutely love all the versions.The most common one is Khaman Dhokla which I would like to post it some time later.
moong dal dhokla
Moong dal Corn Dhokla is also known as 'Mexican Dhokla', though I am not sure why it is given that name. Usually in Mexican Dhokla, a layer of potato slices are arranged on the batter and is steamed together which adds a nice look to the Dhokla and is a nice variation from the regular one.I have not added potato slices to it as I was in a hurry as I prepared this for DH's breakfast box.The addition of corn adds a slight hint of sweetness and also a bite in between as we add the whole corn kernels in the batter.If you are looking for healthy options for Kid's Tiffin box, I would definitely suggest you to try this once as it is a healthy and protein packed snack.
moong dal dhokla
Check out few low fat Snacks recipes for Kids Tiffin box:
mexican dhokla

Moong Dal Corn Dhokla Recipe:
Serves 3-4
Prep time:15 mins | Cooking time:15 mins | Total time:30 mins + soaking time
Cuisine: Gujarati-Indian | Category: Snacks

Ingredients:
1/2 cup Moong dal(yellow lentils)
1/2 cup fresh Corn kernels
2 Green chillies
1 tsp Ginger,grated
1 tbsp Chickpea flour(Besan)
1 tbsp Oil
2 tbsp Sour Curds,beaten
1 tsp Sugar
1 tsp Eno (Fruit Salt)
1/4 tsp Citric acid crystals
1/4 tsp Turmeric powder
1 tbsp chopped Coriander,to garnish
2 tbsp grated fresh grated Coconut,to garnish
Salt to taste

to temper:
2 tsp Oil
1/2 tsp Mustard seeds
1 tsp Sesame seeds
1 Green chilli,slit
a sprig of Curry leaves
a pinch of Asafoetida(Hing)

Method:
  • Wash and soak moong dal for 2-3 hrs.Rinse and drain the excess water.
  • Grind soaked moong dal with 1/3 cup corn kernels, ginger and green chillies to a fine batter.
  • Take the mixture into a bowl and add besan(chickpea flour), rest of corn kernels(roughly 2 tbsp), sugar, beaten curd, citric acid crystals, turmeric powder, salt, sugar and oil and mix nicely.The batter consistency would be some what similar to idli batter.
  • Just before steaming add eno to it and mix nicely.The batter would be frothy.Immediately pour into a greased flat steel vessel or dhokla container to 1 inch thickness and steam it for 12-15 mins after the steam starts coming out.I use my pressure cooker to steam it and I remove the whistle from it.
  • Cool it a bit and run a sharp knife in the edges and carefully unmold the dhokla into a plate.
  • Heat oil in a small tempering pan and crackle mustard seeds and sesame seeds.
  • Add green chillies, curry leaves and asafoetida and fry until the chillies wilt and spread the seasoning all over the dhokla.Garnish with grated coconut and chopped coriander leaves.
  • Cut it into squares or triangles of required size.
Serve it with Green Chutney and Meetha Chutney.

moong dal corn dhokla
Notes:
  1. You can avoid corn kernels in the recipe and make it with just moong dal. Increase the dal quantity to 1 cup in that case.
  2. If you want you can arrange a layer of thinly sliced potato slices on the batter before steaming.It is called Mexican Dhokla if prepared in this way.
moong dal dhokla

Cabbage Carrot Stir fry | Easy Side dishes for Rice

$
0
0
cabbage carrot stir fry
I prefer to use Cabbage mostly in stir fries than the curries as TH is not fond of soft cooked cabbage.Cabbage Paratha is again a favorite with the crunchiness of fresh cabbage bites in it.Cabbage can be paired with many vegetables like carrots,peas,potatoes,sprouts and also with various dals like moong dal,chana dal,chickpeas. I absolutely love all the combinations and also try new combinations sometimes.
You can check out various Cabbage recipes here.

cabbage carrot stir fry

 Cabbage Carrot Stir fry Recipe:
 Serves 2-3
 Prep time:10 mins | Cook time:15 mins | Total time:25 mins
 Cuisine: South Indian | Category: Side dish for Roti|Rice
  
 Ingredients:
 1 small Cabbage,shredded thinly
 1 large Carrot,grated
 5-6 Green chillies,slit
 2 tsp Chana dal
 1 tsp Urad dal
 1 tsp Mustard seeds
 a pinch of Turmeric powder
 a pinch of Asafoetida
 5-6 Curry leaves
 1 tbsp Oil
 Salt to taste

Method:
  • Heat oil in a pan and crackle mustard seeds and add asafoetida.
  • Add chana dal,urad dal and fry them until they turn golden in color.
  • Add curry leaves,green chillies and fry them until they wilt.
  • Now add shredded cabbage and fry well for 3-4 mins.
  • Add grated carrots and,turmeric powder and fry for a couple of minutes.
  • Cover it and cook for 5-6 mins.
  • Add salt at the end and mix well.
 Serve it hot with Rice/Rotis.
  
 Notes:
  1. You can add roasted peanuts(slightly crushed) at the end for extra crunch.
  2. Green peas or sprouts can also be added to the curry.
  3. You can replace green chillies with red chili powder in the recipe.
  4. If you wish you can add grated coconut at the end.
You can check few stir fry varieties with cabbage here:
cabbage carrot stir fry

    Baby Corn Pulao | Babycorn Recipes

    $
    0
    0
    Babycorn Pulav
    This recipe was sitting in my drafts from almost eight months and I finally decided to post it now. This is a very simple pulao which is prepared with baby corns. The recipe is very similar to my Vegetable pulao recipe just with the difference being that  I added coconut milk here instead of water.
    Babycorn Pulav
    I have mentioned many times earlier about my love for baby corns and this pulao is definitely one of my favorite recipes with baby corns.The slight crunch and sweetness of  baby corns adds a nice taste and texture to the pulao.
    Pulavs and Rice Varieties are ideal for lunch boxes as they are very easy to eat.You can just pair it with raita and papad and a wholesome meal is ready.I even prefer to make pulavs over the weekends as they are not only easy to make but also serve as a simple and delicious meal.
    Babycorn pulao
     If you are a fan of Baby corns like me,so check out other baby corn recipes in my blog:
    Babycorn pulao

    Baby Corn Pulav Recipe:
    Serves 2
    Prep time:20 mins | Cooking time:40 mins | Total time: 1 hr
    Cuisine:Indian | Category: Pulao Varieties - Main Course

    Ingredients:
    1 cup Basmati Rice
    2 cups Coconut Milk
    10-12 Babycorns,cut into pieces in an angle
    8-10 Cashew nuts
    1 Bay leaf
    1" Cinnamon stick
    3-4 Cloves
    2 tbsp Oil
    1 tbsp Ghee
    Salt to taste 

    to grind:
    3/4 cup Mint leaves
    1/2 cup Coriander leaves
    4-5 Garlic pods
    1/2" Ginger
    2-3 tbsp grated fresh Coconut
    2-3 Red chillies
    3-4 Green chillies
    1/4 tsp Garam masala

    Method:
    • Wash and soak basmati rice for 10 mins.
    • Grind all the ingredients under the section 'to grind' to a fine paste by adding little water.
    • Heat oil and ghee in a pressure cooker or a thick kadai and add Biriyani leaf,cinnamon and cloves and fry them for a minute.
    • Add cut babycorn pieces and fry them nicely for 2 mins.
    • Add ground masala and fry the mixture until the raw smell disappears.
    • Add washed basmati rice and fry the rice for 2 minutes.
    • Add coconut milk,salt and let it come to a boil.
    • Pressure cook for 1 whistle and reduce the flame and cook for 8-10 mins.If you are using thick kadai,cover it and cook until the rice is done.
    • Heat ghee or oil in a small kadai and add cashew nuts and fry them and garnish the pulao with the fried cashew nuts.
    Serve the pulao hot with Onion-tomato raita or Boondi raita.

    Babycorn pulao
    Notes:
    1. Baby corns can be replaced with fresh corn kernels or the corn cob cut into 1" round pieces or soya chunks in the recipe.
    2. You do not need to use thick coconut milk in the recipe.If the coconut milk is very thick you can dilute with little water to get 2 cups of coconut milk of medium thickness.
    Babycorn pulao
    I usually do not plan in advance when I click pics. I usually select the the props just before taking the pics based on whatever I feel would go with the food. This post was one of those where I enjoyed clicking more than cooking.Thought I would share one more pic before I say bye..
    Babycorn pulao

    Paneer Butter Masala Recipe - Restaurant style

    $
    0
    0
    paneer butter masala
    Paneer Butter Masala is my most favorite gravy and we always order this whenever we visit any North Indian restaurant. Well I know that I have mentioned this for several North Indian veggies but if I am asked to choose only one then it would be Paneer Butter Masala.I love it a lot and usually  order kulchas with it. Kulcha or Butter Naan and paneer butter masala is a hit combo, in my view.
    paneer butter masala
    Butter Chicken is the most popular gravy in and outside India and while it's a treat for non vegetarians, this  Paneer Butter Masala is prepared on similar lines and is definitely the king of dishes for the vegetarians.I am sure most of us love paneer based recipes  and we are no exception.DH is a big fan of paneer and hence it is mandatory to prepare at least one paneer recipe in any form.Paneer is also a good source of proteins for vegetarians.
    paneer butter masala
    In my earlier post on Paneer Makhani, I have highlighted a few differences between Paneer Makhani and Paneer Butter Masala.While the ingredients that are used in both the gravies are almost similar,the cooking procedure and the quantity of ingredients varies and this is what makes them taste different. This is an ideal recipe for parties, so dont miss preparing this restaurant style paneer butter masala at home.This recipe has a bit of fat and may not be ideal for calorie conscious one's but one can reduce the fatty content by replacing cream with milk and also the butter quantity. One would have to compromise on the taste though.
    paneer butter masala
    In case you are interested check out  Paneer recipes both dry sabzi and gravy varieties in my blog - Kadai Paneer, Palak Paneer, Paneer Jalfrezi , Paneer Bhurji, Matar Paneer, simple Paneer Sabzi, Paneer Makhani and Grilled Corn-Palak Paneer.

    If you like sweets try this easy Paneer Modak Peda recipe.Its simple and yumm!!
    paneer butter masala

    Paneer Butter Masala Recipe - Restaurant style:
    Serves 3-4
    Preparation time:10 mins | Cooking time:30 mins | Total time:40 mins
    Cuisine:Punjabi-India | Category:Side dish - Main Course

    Ingredients:
    200 gms fresh Paneer
    2 medium Onions
    3 large Tomatoes
    1 tbsp Ginger Garlic paste
    6-8 Cashew nuts
    1/3 cup Milk or 1/4 cup Cream
    1 tsp Coriander powder
    1 tsp Red chili powder
    1/2 tsp roasted Cumin powder
    1/4 tsp Home made Garam masala(or 1/2 tsp store bought)
    a tiny pinch of Turmeric powder
    2 tsp Kasuri Methi
    1/4-1/2 tsp Sugar
    1 small Green chilli,thinly slit
    1 tbsp Coriander leaves,to garnish
    Salt to taste
    2 tbsp Oil
    2 tbsp Butter

    Method:
    • Cut paneer into triangle pieces of 1/2" depth.Immerse them in warm water until its usage.
    • Soak cashew nuts in warm milk for some time.Grind it to a smooth paste along with the milk.If you want to use cream,grind the cashew nuts with a couple of table spoons of milk.
    • Make a cross on tomatoes and blanch them in hot water for 3-4 mins.Remove them and let them slightly cool.Peel the skin and remove the eyes of tomato and chop into pieces and grind it to a smooth puree.
    • Grind chopped onions with ginger garlic paste to a slightly coarse or smooth paste.
    • Heat oil and 1 tbsp butter and add slit green chilli,onion-ginger garlic paste mixture and fry well until it turns slight brown and the raw smell goes away.
    • Add pureed tomato and fry constantly for 6-8 mins over medium heat until the mixture becomes really thick and oil separates.This step is important to get a deep red color to the gravy and also it enhances the taste of it.So fry the tomato mixture until it leaves the pan and take care that you would not burn the masala in any stage.
    • Add roasted cumin powder,sugar,coriander powder,red chili powder and turmeric powder fry well again for 2-3 mins.
    • Add 1 cup of water and boil it for 6-8 mins till the oil separates and the gravy dries up to a thick masala gravy.
    • Remove the kadai from flame and add the ground cashewnut- milk mixture(if you are using cream,add it now).Add kasuri methi,salt and garam masala and give a stir.
    • Return the kadai back on to the burner and keep mixing on low flame and let it come to a boil for 2 mins.
    • Add butter and paneer slices (dipped in warm water) and cook for 2-3 mins stirring continuously.
    Serve hot with flat breads like Naan/Roti/Kulcha or Jeera rice/Bagara Rice.

    paneer butter masala
    Notes:
    1. You can add a tiny pinch of  red food color to the gravy along with the masalas.I don't like to use food colors and hence I did not add it.
    2. The addition of sugar and milk(cream) helps in neutralizing the sourness from tomatoes.So do not miss it.
    3. You can toss few onion rings and capsicum rings in butter and add along with paneer slices at the end.
    4. You can even toss paneer slices in butter for few minutes,do not fry for long otherwise they will become tough.As I like to use soft malai paneer I do not like to toss them as I feel they will loose their texture.
    5. For a vegan version,replace paneer with tofu.Avoid cream,milk and butter.Increase the quantity of cashew nuts in the recipe and follow the same process.
    paneer butter masala

    Roasted Red Bell Pepper Pasta Recipe | Pasta Recipes

    $
    0
    0
    roasted red bell pepper pasta
    Pastas are perfect for weekend lunch or dinner and I usually make it for dinner as I find it easy to cook.As TH prefers mostly Pesto sauces with pasta or a simple one rather than the tomato or the white sauce, I usually end up preparing either Basil Pesto Pasta or Spinach Pesto Pasta or simple Aglio Olio or Sundried Tomato Pesto Pasta or this Red Bell Pepper Sauce Pasta.
    roasted red bell pepper pasta
    I love Bell peppers and especially the red colored bell peppers. I can eat them raw as well.I use the bell peppers often in my cooking in recipes like chutneys, dips, sauce, salad, stuffed bell peppers, rice varieties, curry, stir fry etc. Red bell peppers is very versatile and can be adapted even in Indian cooking.
    roasted red bell pepper pasta

    Red Bell peppers has a mild sweet taste when roasted and it complements the pasta really well.I add a roasted tomato to balance the sweetness of pepper with the slight sourness from tomatoes.This Red Bell pepper sauce is really creamy and nutty with the addition of walnuts.I do not prefer to add cheese to my pastas and the addition of walnuts itself makes the pasta sauce creamy and delicious.
    roasted red bell pepper pasta
     
    If you are interested check out other pasta varieties like Basil Pesto Pasta, Spinach Pesto Pasta, Sundried Tomato Pesto Pasta , Pasta Salad and Macaroni in white sauce in my blog.

    Roasted Red Bell Pepper Pasta Recipe:
    Serves 2
    Prep time:25 mins | Cooking time:20 mins | Total time:45 mins
    Cuisine:Italian - International | Category: Pasta - Main Course

    Ingredients:
    2 cups Penne Pasta(or any other shape like fusili,sphagetti)
    1 Onion,finely chopped
    3-4 Garlic pods,finely chopped
    1 tsp Mixed Herbs or Oregano
    2 tbsp chopped Coriander or Parsley
    1/2 tsp Red chili flakes
    2 tbsp Olive Oil
    2 tbsp Parmesan Cheese,to garnish
    Salt to taste
     
    for roasted Bell Pepper Sauce:
    1 large Red Bell pepper
    1 small Tomato
    10-12 Walnuts
    2-3 tbsp Parmesan cheese(optional)
    2-3 Garlic pods
    2-3 tbsp Extra Virgin Olive Oil(EVOO)
    1/2 tsp Black Pepper powder
    Salt to taste
     
    Method:
     
    to prepare Roasted Red Bell Pepper Sauce :
    • Wash and wipe the red bell pepper and tomato and apply oil all over it and roast them on open flame until they are charred completely by turning it to all sides.Alternatively you can roast it in preheated oven at 180 degrees for 40-45 mins.Drop the hot charred bell pepper and tomato into a vessel and cover it with a lid,this will ease the process of peeling the skin of charred pepper and tomato.Peel the skin off and chop them roughly.
    • Grind roasted,peeled and chopped bell pepper,tomato with walnuts,parmesan cheese,extra virgin olive oil,garlic pods,black pepper powder and salt to a smooth puree.
    to cook pasta:
    Cook according to the instruction of your package or follow this procedure:
    • Bring water to boil in a big pot (filled to its half) and add salt,1 tsp olive oil and pasta and cook over medium flame for 10-12 mins until al dente(cooked and tender to teeth).You can cook it further for 2-3 mins more to get soft pasta,but definitely do not make it soggy.
    • Drain and reserve 1/2 cup of water for later usage.you can even give a cold bath to the pasta by running it under fresh tap water which helps in keeping the pasta separate.
    to prepare roasted bell pepper pasta:
    • Heat olive oil in a wide bottomed pan and fry sliced garlic until slight brown and then add chopped onions and fry until they are pink and soft.
    • Add the bell pepper pasta sauce and mix well.Add 4-5 tbsp of reserved pasta liquid if required add more to get a medium sauce consistency.
    • Add cooked pasta and mix well until all the pasta is covered with the sauce and is warm.Now add red chili flakes,Italian herbs,chopped parsely,salt(remember we added salt in sauce as well,so add accordingly)and mix well.Season with more pepper if you want.
    • Dish it out to the serving platter and sprinkle some Parmesan cheese over it.Garnish with parsley.
    Serve it hot or warm with Lime Soda or drink of your choice.
     
    red bell pepper pasta

    Notes:
    • You can even add bechamel sauce or cream to the bell pepper sauce in the above recipe to give a nice creamy texture to the pasta.
    • You can add more Parmesan cheese while preparing sauce in the above recipe to make pasta more cheesy.
    • You can replace penne pasta with any of the pasta like spiral, fusili, sphagetti, macaroni , farfelle or any other pasta of your choice.
    • You can add colored bell peppers, blanched broccoli, thinly sliced mushrooms, zucchini to the pasta
    • For a Vegan version avoid parmesan cheese while making pesto,it tastes even delicious without cheese in it.
    • Walnuts can be replaced with cashew nuts or almonds in the recipe.
    red bell pepper pasta

    Watermelon Juice | Easy Drinks Recipes

    $
    0
    0
    water melon juice
    I usually prefer eating whole fruit rather then preparing juices and that's the reason I don't have many juice posts in my space. Moreover juices are simple to prepare so posting recipes of fresh juices may not be required but according to me, a juice can be prepared with several variations and hence am posting one such recipe today. Look out for the finer points in the notes section.
    watermelon juice
    I usually prefer milkshakes to juices but a few fruit varieties are not suitable to prepare milkshakes and tastes best in the form of juice. Watermelon belongs to this category and as it has high water content one can eat it as it is or turn it into juice. I have been planning to post water melon juice from a long time as the colour of watermelon juice is captivating and appetizing!! But to my bad luck, the day I had planned to take pics, the weather was very gloomy and made me struggle to capture this gorgeous juice. I am not very happy with the clicks and did not meet any expectations from what I had actually thought in my mind, anyways would like to capture more juices in future to bring those bright colourful juice recipes in my blog.
    watermelon juice

    If you are interested check out other interesting beverages like Mango Lemonade , Bonda Juice(Tender Coconut Cooler), Butterfruit(Avocado) Milkshake and Oats-Fruits Smoothie.
    For a complete range of beverages check here.

    Watermelon Juice Recipe:
    Yields 2-3 glasses
    Prep time:10 mins | Grinding time:2 mins | Total time:12 mins
    Cuisine: Indian/International | Category: Beverages
     
    Ingredients:
    3 cups Watermelon, diced and seeded
    2-3 tbsp Sugar, to taste
    1/2- 3/4 cup chilled Water roughly
    Ice cubes, to serve(optional)
     
    Method:
    • Cut the watermelon and remove the seeds. I do not prefer ice hence I avoid it and refrigerate watermelon pieces for some time.
    • Blend the watermelon pieces with sugar and water to a smooth juice. Do not add water at one shot, add it in intervals  and also according to you required consistency. Now taste it and add more sugar if needed. Strain the juice.
    Serve it by adding ice cubes.
     
    water melon juice
     
    Notes:
    1. This is a very basic water melon juice recipe with out any flavours. If you like you can add 1-2 tsp lemon juice or 1 tsp chopped ginger while grinding it for extra punch.
    2. You can even freeze watermelon cubes and blend it with sugar like a smoothie.
    3. Various fruits like pomegranate, oranges, mosambi(sweet lime) and grapes can be combined with water melon.
    4. Sugar can be replaced with honey in the recipe.
    5. You can also prepare with out sugar by adding mint leaves, chaat masala, kala namak and roasted cumin powder for a more chatpata juice.
    watermelon juice

    Eggless Vanilla Sponge Cake Recipe | Eggless Tutti Frutti Cake

    $
    0
    0
    I have never developed a liking for cakes that have cream frosting or any Icing applied on it and my preference is for the plain cake - vanilla or chocolate.I still remember those days when we used to have plain Vanilla Sponge Cake at Butter Sponge in Bangalore city; believe me that cake used to be absolutely soft and fluffy.
    I do make cakes with Icing but only for specific occasions but in general I prefer to bake simple plain cakes on a regular basis as an accompaniment with evening tea/coffee or just as an anytime snack.I also use this plain Vanilla Sponge Cake for Cake Pops and also as a base for Fruit Trifle | Trifle Pudding.
    A few years back when I saw this recipe in Madhuri's blog,which she tried from Nita Mehta's book,I knew that I would be baking that cake as I was in search of good Sponge Cake at that time.I am glad that I prepared that cake as my search for a good Eggless Vanilla Sponge Cake finally ended. I wonder why it took so long for me to post this beautiful cake recipe in my blog.The recipe is quite simple with no butter or any other fancy substitutes-it is a simple and straight forward recipe.You should try this recipe and am sure you would agree that it is the best Eggless Vanilla Sponge Cake recipe.
    If you are in search for a good Eggless Cake recipes I would strongly recommend you to try these tried and tested Eggless Cake recipes from my blog which were appreciated by many.

    Basic Eggless Vanilla Sponge Cake | Eggless Tutti Frutti Cake Recipe:
    Makes one 8" round cake or 4"x7" loaf tin
    Original recipe source: Nita Mehta
    Prep time: 10 mins | Baking time: 30-40 mins | Total time: 1 hr
    Cuisine: Indian|International | Category: Cakes - Baking

    Ingredients:
    1 1/2 cups All purpose flour(Maida)
    3/4 cup Sugar
    1 cup Curd,beaten
    1/3 cup Tutti frutti(optional)
    1/2 cup Oil
    1 1/4 tsp Baking powder
    1/2 tsp Baking Soda
    a pinch of Salt
    2" Vanilla Pod or 2 tsp Vanilla essence
    1 tsp milk,to brush the cake
    2 tsp flour,to coat the tin and tutti frutti

    Method:
    • Grease an 8" round pan or the 4"x7" loaf tin with oil.Add a tsp of flour and shake it well so that it coats all the sides and bottom of the tin.Alternatively you can line it with baking paper,make sure you cut it into right size before lining it in the pan.
    • Preheat the oven at 200 deg C(400 deg F) for 10-12 mins.
    • Sieve all purpose flour a couple of time to ensure that there are no lumps in it.
    • Grind sugar to a fine powder in mixer.You can avoid this step if your sugar is fine,as the sugar crystals what we get here are very big I usually grind it before using in the cake.
    • In a bowl beat curd until smooth.Add sugar powder to it and beat again for 2-3 mins.
    • Add baking powder and baking soda to the curd mixture and mix well and leave it aside for 2-3 mins.The curd mixture will become frothy and increase in volume,you can see some bubbles forming in it.
    • Scrape the vanilla bean if you are using and keep it ready.
    • Now add the scraped vanilla pod or vanilla essence and oil to the curd mixture and mix it gently and make sure that the air in the mixture is not lost.
    • Add the flour in two batches and gently fold the flour into the mixture until you get smooth dropping consistency.Do not stir vigorously as it will loose air in the mixture,hence do it gentle.
    • In a small bowl take tutti frutti and add 1 tsp of flour and mix well.the addition of flour to tutti frutti ensures that it will not settle in the bottom of the tin.
    • Add the tutti frutti to the cake batter and fold it nicely.
    • Pour this batter into the prepared tin and keep it ready.
    • Reduce the oven temperature to 180 deg C(350 deg F) and place the tin in the preheated oven and bake it at 180 deg C for 35-40 mins.The baking time varies from oven to oven,hence keep an eye over it after 30 mins.
    • You can insert a toothpick in the center of the cake to check whether it is done or not.If the toothpick comes out clean with few cake crumbs then your cake is ready.If the toothpick has some batter stuck to it keep the tin back in the oven and bake for some more time.
    • Brush the top of the cake with milk and put it back in the oven and bake for 2 mins.This gives a shiny look on top of the cake.However this step is optional.But I recommend you to do that.
    • Remove the tin from the oven and let it sit for 5 mins.
    • Run a sharp knife around the edges of the cake and gently turn it upside down onto a wire rack and let it cool completely,approx 2 hrs.
    • Once it is completely cooled,slice the cake into thick slices using a serrated knife.
    Serve it with tea/coffee or eat as it is as a snack.

    Notes:
    1. The original recipe calls for 1 cup of sugar,however I followed her recipe and reduced it to 3/4 cup which is right enough quantity of sugar for a tea cake.If you really have a sweet tooth you can add 1-2 tbsp of sugar extra in the cake.
    2. You can bake the cake plain with out tutti frutti as the original recipe and can decorate with the icing of your choice.
    3. You can keep it out for 2 days and can be stored for 4 days in refrigerator.Just pop it in microwave for 10-15 seconds if you refrigerate the cake.
    4. Do not alter the measurements of the cake,these measurements perfectly yields soft and fluffy cake.
    5. I like to use vanilla pod in my baking as it adds great flavor to the cake.If you do not get them use good quality vanilla essence.
    6. This cake makes a perfect base for dessert recipes like Fruit Trifle.

    Mangalore Buns Recipe | Banana Buns | Sweet Banana Pooris

    $
    0
    0
    mangalore buns
    I didn't knew about these Mangalore Buns until a decade back. I vaguely remember that I heard this name from one of my aunts when they were discussing about recipes but my mom never gave a thought to prepare it and we ignored it. When we had gone for a family trip to a few places in Karnataka, I finally got a chance to taste these Mangalore Buns for the first time. Do you remember my Bonda Juice recipe which I posted long back(almost few years back), even that recipe is inspired from my Mangalore trip.mangalore buns
    Though Mangalore cuisine is predominantly non-vegetarian, it has various breakfast and snack options which tastes really good and I am kind of addicted to them. Few of my personal favorites from Mangalore are Goli Baje, Buns, Neer Dosa, Churmuri, Kadubu, Bonda Juice to name a few.                 
    The word 'Buns' associated with Mangalore Buns is quite misleading if you are hearing it for the first time, do not get confused with the regular baked buns. These buns are deep fried and made of mashed banana mixture and flour which is kneaded to a dough and fermented for a few hours. The fermentation process helps in getting these banana buns(pooris) a different bun like texture unlike the regular pooris. These are prepared mildly sweet and it tastes best with a very spicy Coconut chutney, they both complement really well.
    banana buns
    Even TH loved these Mangalore Buns when he tasted for the first time and approved it as a regular breakfast item at our place.He does not like the deep brown color of it and hence I do not let them deep brown in color and remove them while they are light brown and cooked well.You can serve them for breakfast or a snack with a cup of tea or coffee.I hope I have tempted you enough to try this recipe, what are you waiting for?? try these delicious Mangalore Buns for a snack or breakfast in this rainy season and enjoy!!
    mangalore buns
    Mangalore Buns Recipe:
     
    Yields: 8-9 Buns
    Prep time:10 mins | Cooking time:20 mins | Total time:30 mins + 5 hrs fermentation
    Cuisine: Karnataka - India | Category: Snack/Breakfast

    Ingredients:
    1 1/2 All purpose four(Maida)
    1 medium sized ripen Banana
    3-4 tbsp slightly sour Curd
    2-3 tbsp Sugar
    1/2 tsp Cumin seeds(optional)
    a fat pinch of Cooking Soda
    2 tsp Oil
    Salt to taste
    extra flour, for dusting
    Oil,to deep fry

    Method:
    • Peel and cut banana into pieces and grind it along with sugar.You can mash the banana nicely if you want. I prefer to grind it.The pulp should yield 1/2 cup approximately.(Make sure your sugar is fine variety like castor sugar,otherwise if it is granular grind it in mixer to a powder).
    • Keep aside 1/4 cup flour and take the remaining flour(maida) in a bowl and add salt and cooking soda to it and mix well.
    • Add curd, cumin seeds and gradually add banana puree and mix.Do not add all the pureed banana mixture at once,add slowly the required portion and mix.The mixture would be slightly sticky by the time you mix all the banana mixture in the dough.Do not add water while mixing,the moisture from the banana puree and curd is enough to bind the dough.Now add the remaining 1/4 cup flour which is kept aside and mix well.If the dough is sticky add 2-3 tbsp of extra flour and mix to get a fairly thick dough.Remember that the dough would loosen up a bit after the fermentation process.
    • Now add the oil and gently knead the dough for 2-3 mins.
    • Cover and leave it aside for 4-5 hrs. As I usually prepare this for breakfast I leave it overnight in the fridge and remove it in the morning and keep for 1-2 hrs outside.
    • Heat oil in a deep curved pan and let it become hot.If you put a small pinch of dough it should raise to the top immediately,which indicated the oil is hot and ready for deep frying.
    • Slightly knead the dough and divide the dough into 8-9 big lemon sized portions.
    • Roll each portion by dusting it with flour into a 3-4" diameter thick disc,it should be thicker than the regular poori. Remove the extra dusting of flour by gently patting on the discs.
    • Gently slide the rolled discs(pooris) into the hot oil and after few seconds try to press the middle portion of the disc gently with a slotted spoon,which helps to fluff up the bun(poori) nicely.
    • Turn to the other side and fry until brown.These buns usually turn to dark brown in color very quickly,you can remove them when they are puffed up and light brown in color like I did or you can continue frying until they turn dark brown.
    • Remove them with a slotted spoon on to a kitchen napkin.Follow the same process with the remaining buns,I usually fry only one at a time.
    Serve them hot with spicy Coconut chutney and a cup of tea/coffee. You can even serve it with Sambar but for me Coconut chutney and Buns are best preferred combo.
    banana buns

    Notes:
    • Ideally Mangalore buns are prepared with plain flour(maida).If you like, you can even prepare the same with wheat flour or a mix of maida and wheat flour in the ratio of 2:1(maida:wheat flour) and prepare the dough.
    • Use ripened bananas for this,you can use long variety or even smaller variety like Yelakki banana.
    • You can even use freshly ground pepper powder to spice up the buns.I usually do not add it.
    • If you like you can even add a pinch of cardamom powder while making dough.Cardamom complements the banana nicely,but I prefer buns very simple.
    • Always prepare the coconut chutney extra spicy as the mild sweetness of banana buns tastes great with the spicier version of coconut chutney.
    • It is ideal to leave it aside for 4-5 hrs for fermentation of dough which makes the buns get a nice texture.Alternatively you can refrigerate the dough overnight and take it out 1-2 hrs before in the morning you prepare them.
    • Do not add water to the batter,the moisture from banana mixture and curd is enough to bind the dough.
    • One can alter the amount of sugar according to your taste buds,but it tastes best when it is midly sweet.
    • Mangalore Buns can be stored for up to a day or two. I usually finish it off by evening if I have left over buns, they taste even better by evening and makes a nice combination with a cup of tea or coffee.
    mangalore buns

    Methi Thepla Recipe | Gujarati Methi Theplas

    $
    0
    0
    gujarati methi thepla
    The moment I think of Gujarati cuisine I get remind of methi theplas and dhoklas. I prepare methi theplas quite often as they are very easy to prepare,I usually prepare theplas for dinner and preserve few to have for the breakfast next day.As these theplas stay good for long,it is an ideal dish for traveling.You can eat them with a pickle and plain yogurt.
    gujarati methi thepla
    I have posted Methi paratha recipe long back which is very different from this recipe.We prepare them in few variations - we stir fry the methi with other ingredients and mix the dough with it or add the methi leaves directly to the dough like how we do for methi theplas.These kind of theplas and parathas  are easy to prepare when compared to stuffed parathas.They make a simple meal and hence I prefer to make them when I am in no mood to cook elaborate meals.
    Check out other easy parathas recipes - Cabbage paratha and Methi Paratha.
    methi thepla

    Gujarati Methi Theplas Recipe:
    yields:9-10 theplas
    Prep time:30 mins | Cooking time:20 mins | Total time: 50 mins
    Cuisine: Gujarati - Indian | Category: Breakfast/Snacks

    Ingredients:
    2 cups Whole Wheat flour
    1 cup Besan(Chickpea flour)
    2 cups Methi(Fenugreek) leaves
    1 tbsp Aam ka achar masala(optional)
    2-3 tbsp Curd
    1 tbsp. Sesame seeds
    1 tsp Coriander powder
    1/2 tsp Red chili powder
    1 tsp Cumin powder
    1 tsp Ginger-Green chili paste
    1/2 tsp Turmeric powder
    2 tbsp Oil
    Salt to taste
    Oil/Ghee,to roast theplas

    Method:
    • Chop methi leaves finely and add salt and leave for 5 mins.Squeeze the extra water from the methi leaves completely,this will remove the bitterness of the leaves.However this step is optional.
    • Take a big bowl and add wheat flour and besan along with all the masalas and mix well.
    • Add oil and curd and rub and mix the flour nicely.
      Now add methi leaves, sesame seeds, aam ka achar masala with little water and knead till the dough is smooth and soft.If the dough becomes sticky sprinkle some more flour and knead again.
    • Grease your hands and knead it again until it gets the elastic texture.cover it and leave it for 20-25 mins.
      Make medium size balls of the dough and roll it to a disc of  6'' in diameter by dusting it in between with the dry flour .
      Heat a thick tawa and place the rolled thepla on the tawa and let it cook slightly on one side.Turn it to the other side and apply 1tsp oil/ghee and roast and then turn it again and apply oil(ghee) and let it roast on both sides till it forms the brown spots.
    • Prepare all the theplas in the same manner and stack them in a roti basket.
    Serve the theplas hot/warm/cold with Pickle and yogurt.I served mine with Mixed Vegetable Achar.
    methi thepla
    Notes:
    1. The addition of aam ka achar(mango pickle masala) is optional,but I recommend to use it if you have it in hand.
    2. These theplas stay good for 2 days and hence it is ideal for traveling.Spread them until they come to room temperature and then pack them.
    3. You can follow the same process to prepare lauki thepla by replacing methi leaves with grated bottle gourd.You need to squeeze the water slightly from bottle gourd and then mix with atta.
    4. You can add 1/2 tsp Carom seeds(ajwain) or a pinch of hing while making the dough.I usually add either of them to avoid indigestion because of the usage of besan.
    5. Gujarati people add sugar in their dough.I do not add ,but if you would like to add ,add a tsp of sugar while mixing the dough.
    methi thepla

    Karivepaku Podi | Curry Leaves Powder for Rice

    $
    0
    0
    karivepaku podi
    A typical south Indian meal is incomplete without a Podi(spicy powder).We prepare various podi varieties,while few are paired with breakfast others with rice.Mom makes various podi varieties and she always packs a few varieties for me when I visit her.Her Kakarakaya(Bittergourd) podi is quite tasty and is the most favorite one at our home.
    As I usually stock these podi varieties sometimes it is really helpful on those lazy days.I just prepare steamed rice and mix various podi varieties with hot rice and ghee along with fryums and papads- a satisfying meal for me.
    My mom prepares this Curry leaves powder in a different way and we use dry coconut as the base while in Andhra and Tamilnadu they use lentils like chana dal and urad dal to prepare it.This version with dry coconut is quite different and tastes really delicious- give it a try. Please go through the recipe and notes carefully before proceeding to prepare,I assure you that you will love it.
    curry leaves powder
    Karivepaku Podi Recipe:
    shelf life:2-3 months
    Prep time:10 mins | Cooking time:40 mins | Total time:50 mins
    Cuisine: South Indian | Category: Accompaniments - Podis

    Ingredients:
    3 Cups Curry leaves
    1/2 cup grated Dry Coconut
    8-10 Red chillies
    1 small gooseberry sized Tamarind
    2 tsp grated Jaggery(optional)
    2 tsp Mustard seeds
    2-3 tbsp Oil
    Salt to taste

    Method:
    • Wash the curry leaves and wipe them with a kitchen towel completely and spread in a thin layer and let them dry for few hours until no moisture is left. They would not get dried completely, they will just loose the moisture content slightly.
    • Heat 1 tsp oil and add red chillies and fry them until they turn brown and remove them and let them cool.
    • Grind red chilies with grated dry coconut  and salt to a coarse powder. Add jaggery and tamarind and grind it again. Remove the mixture and keep it aside.
    • Grind the curry leaves(slightly dried) to a coarse powder in WHIPPER mode. Do not run it in normal mode as it might turn to a chutney.
    • Heat 2-3 tbsp oil in a thick kadai and crackle mustard seeds and add coarsely ground curry leaves to it and fry until the curry leaves are browned and become slightly crispy. They will turn to brown to slight blackish in color. This will take 15-20 mins.
    • Add ground coconut- chili mixture to it and fry again for another 3-4 mins.
    • Cool the powder completely. Store it in air tight container.
    Serve it with hot rice and ghee and raw onion if you prefer.
     
    Notes:
    1. My mom usually grinds the slightly dried curry leaves first and then fry it in oil. Hence the color of the curry leaves is not preserved but it tastes delicious with wonderful flavor and also can be stored for long.
    2. If you want you can even fry the curry leaves in oil and then powder it along with the red chili - coconut mixture.
    3. In Andhra,instead of coconut they use chana dal and urad dal to make this podi. Instead of  dry coconut you can use 4 tbsp of chana dal,2 tbsp urad dal and 1 tsp cumin seeds fry them in oil and grind with roasted red chillies,curry leaves,salt and tamarind to a powder. Check out a verison of Karivepaku Karam podihere which is prepared for tiffin varieties.
    karivepaku podi

    Check out few podi varieties which goes well with rice:

    Mango Sheera | Mango Sooji Halwa(Kesari) Recipe

    $
    0
    0
    mango sheera
    'Sheera' is a simple but popular sweet in India. It is known as 'Sooji ka Halwa' in North and 'Kesari' in South India, though the basic ingredients are the same the texture,color and the preparation method slightly vary in these versions - the end product though tastes almost same. The flavors for Sheera are quite versatile and one can use any seasonal fruit or nuts or even chocolate to make sheera,the options are end less and left to your imagination.
    mango sooji halwa
    More than the regular Sheera(or Kesari) I usually prefer either Pineapple Sheera or Mango Sheera as the addition of the fruits will give a different dimension of taste to the basic sheera. During Mango season it is a norm to prepare Mango Sheera at my place and I have prepared quite a number of times but could not share it in my blog so far in this season. As I prepare in small portion we usually prefer to eat it immediately and finish it off and never had a chance to click it.Finally I decided to prepare it again over the last weekend to post it before the mango season ends and more so I didn't want to wait until the next season to post this simple and delicious Mango sheera.
    mango halwa
    The preparation process of Mango sheera is quite similar to the regular sheera- it's just that, we add mango pulp in the end. One can add chopped mango pieces or pureed mango or a mix of pureed mango and mango pieces to the sheera according to their wish, it tastes nice in any form!. I prefer adding pureed mango and a small portion of mango bites to the sheera. Let's get into the recipe with out much delay.
    mango sooji halwa

    Check out other simple sweets and dessert recipes with ripen mangoes here:
    mango sheera

    Mango Sheera | Mango Sooji Halwa(Kesari) Recipe:
    Yields 3-4 servings
    Prep time:10 mins | Cooking time:20 mins | Total time:30 mins
    Cuisine: Indian | Category: Sweet/Dessert
     
    Ingredients:
    1/2 cup Sooji/Rava
    1/2 cup +  2 tbsp Sugar
    1 medium ripen Mango(Alphonso or Kesar preferably)
    3/4 cup whole cream Milk
    3/4 cup Water
    few Saffron strands
    2 Green Cardamoms, seeded and powdered
    8-10 Cashew nuts,split
    2 tbsp Raisins
    3-4 tbsp Ghee
     
    Method:
    1. Cut mango into pieces(reserve 2 tbsp finely chopped mangoes) and grind the remaining to a smooth puree and keep it aside.It should yield 1/2 cup approximately.
    2. Warm 1 tbsp of milk and add saffron(crush the saffron slightly before adding) to it and keep it aside for 10 mins.
    3. Heat 2 tbsp ghee in a kadai/pan and add cashew nuts and fry until they turn light brown in color and remove them with a slotted spoon. In the same pan add raisins and fry them until they bulge up, remove and keep them aside.
    4. Now in the same pan add rava and fry until the rava becomes aromatic and very light brown in color. Do  not roast for long,it should not change the color to deeper brown.
    5. Meanwhile boil water with sugar in another pan until the sugar melts.
    6. Add the boiling water to the roasted rava mixture by mixing it simultaneously and cover it and cook for 2-3 mins until the rava absorbs the water.
    7. Add the milk and mix again and cook for a minute. Rava would absorb all the liquid and becomes slightly dry now.
    8. Now add the ground mango puree to it and mix well and cook for a minute. The halwa becomes bit loose in consistency.
    9. Lastly add cardamom powder, saffron infused milk, roasted cashew nuts and raisins, reserved chopped mango pieces and 2-3 tbsp ghee and mix well. Cover it and let it cook for 2 mins on low flame until the halwa becomes shiny.
    10. Switch off the flame and cover it for 5 mins undisturbed.
    Serve it hot/warm.
     
    mango kesari

    Notes:
    • This halwa tends to thicken a bit as it sits. You can microwave it for a minute before serving.
    • You can follow the same recipe and make plain sooji halwa, just avoid mango in the recipe and follow the same process.
    • Mango can be substituted with chopped tinned pine apple pieces or pine apple pieces simmered in sugar water to make Pineapple Kesari.
    • Milk can be avoided and instead you can use just water in the recipe or vice versa.
    • You can just add boiling and once the rava is cooked you can add sugar to it, you can do either ways.It is believed that rava does not get cooked nicely when cooked along with sugar,but I tried cooking rava along with sugar solution many times and I never had problems.But you can either ways.
    • You can even use tinned mango pulp if you do not have mangoes in hand.
    mango halwa
    Viewing all 520 articles
    Browse latest View live