Check out other Dosa varieties from the streets of Mumbai:
- Schezwan Dosa
- Spring Dosa
- Pav Bhaji Dosa
- Masala Uthappam | Uthappam topped with spicy alu masala
- Mumbai style Mysore Masala Dosa.

Mumbai Mysore Masala Dosa Recipe:
Yields 6-8 dosas
Prep time:10 mins | Cooking time:20 mins | Total time:30 mins
Cuisine: South Indian Fusion | Category: Breakfast/Snacks
Ingredients:
2-3 cups Dosa batter
1/4 cup chopped Coriander leaves
1/4 cup chopped Coriander leaves
Butter and Oil, to roast
for Potato Stuffing:
2 medium Potatoes,boiled and mashed
1 small Onion,finely chopped
2 Green chillies, chopped
1/4 tsp Turmeric powder
a sprig of Curry leaves,chopped
1/2 tsp Cumin seeds
1/2 tsp Mustard seeds
a pinch of Asafoetida(Hing)
Salt to taste
2 tsp Oil
for Potato Stuffing:
2 medium Potatoes,boiled and mashed
1 small Onion,finely chopped
2 Green chillies, chopped
1/4 tsp Turmeric powder
a sprig of Curry leaves,chopped
1/2 tsp Cumin seeds
1/2 tsp Mustard seeds
a pinch of Asafoetida(Hing)
Salt to taste
2 tsp Oil
for Vegetable filling:
3/4 cup of mixed finely chopped vegetables(tomato,onion,capsicum,cabbage)
1/4 cup of grated vegetables(carrot and beetroot)
Salt to taste
2 tsp Oil
for Red Garlic Chutney:
3-4 Byadige Red chillies
7-8 Garlic Pods
Salt to taste
for Red Garlic Chutney:
3-4 Byadige Red chillies
7-8 Garlic Pods
Salt to taste
Method:
to prepare Potato filling:
- Heat oil in a kadai/pan and crackle mustard seeds and cumin seeds and then add asafoetida.
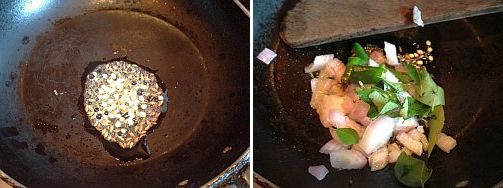
- Add finely chopped green chillies and curry leaves and fry until they wilt.
- Now add chopped onions and fry well until they turn translucent.
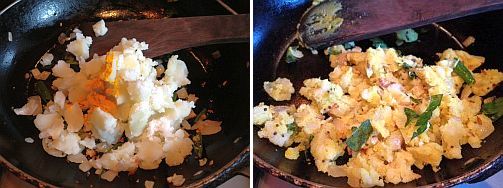
- Add turmeric powder to it and mix.Add nicely mashed potatoes and salt to it and mix it properly. Keep it ready.
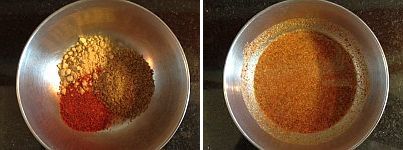
- Soak red chillies in hot water for 10-15 mins.Drain them and grind with garlic pods and salt to a fine paste.Add water if needed while grinding.
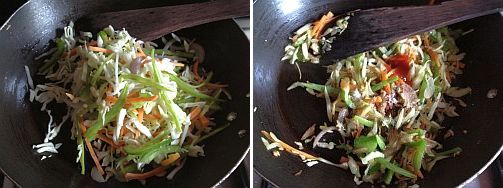
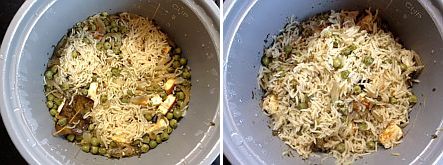
to prepare Veg filling:
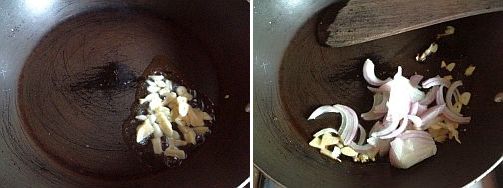
- Heat oil in a kadai/pan and add finely chopped onions and fry until they turn translucent.
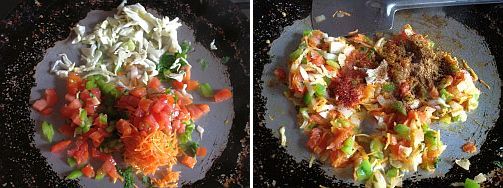
- Add grated carrots and beetroots and finely chopped capsicum and fry on high heat for 1-2 mins.
![]()
- Now add chopped cabbage and quickly fry for another minute.The crunchiness of vegetables is to be maintained and hence do not over cook the vegetables.
- Add red chili powder, garam masala, pav bhaji masala and salt to it and mix well and switch it off and keep the mixture ready.
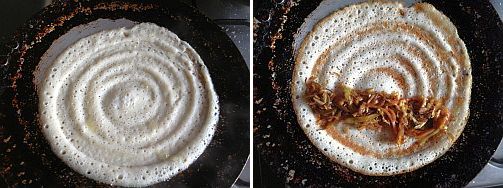
to make Dosa:
![]()

- Keep the masalas- potato masala and mixed vegetable mixture ready. Make the tawa ready for preparing dosa,keep the stove on medium flame and pour a ladle full of batter in the middle of the pan and spread in a circular motion to form a 7-8 " THIN dosa and pour some oil (1 tbsp roughly) all over the edges and in the center cover it with a lid.
![]()
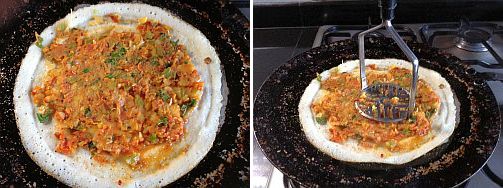
- Add 1 tsp butter, 1 tsp red garlic chutney, 1 tbsp chopped coriander leaves and 2-3 tbsp prepared potato filling and 2-3 tbsp prepared vegetable stuffing mixture.
![]()
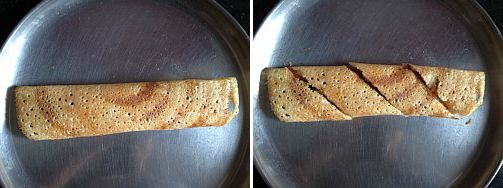
- Mix and spread them using a spoon or spatula or the masher according to your convenience. Level the mixed stuffing using the spatula. Keep the flame on HIGH and let it roast for another minute until it turns golden brown and crispy. Do not over roast it as it will be difficult to fold it as shown.


- Roll the dosa carefully to form a roll.
- Remove it from the tawa and cut it into 3-4 pieces using a pizza cutter or sharp edge of spatula or knife.You can even cut it diagonally.

Notes:
- You can basically use any dosa batter recipe to prepare this dosa but make sure you spread the dosa very thin.
- Do not miss any component in the recipe to enjoy the taste of this fusion dosa.
- Also do not skip Pav bhaji masala in the recipe which lends a nice taste to the dosa.
- I did not have beetroot on that day and hence I did not add it.
- Usually all the vegetables and spices are added directly on the dosa along with potato mixture,garlic chutney,butter and is mashed directly on the tawa. The tawa and the heat plays a major role when comes to home made dosas and hence we cannot do it easily as the street hawkers do, I suggest you to lightly saute the vegetables ahead which not only makes it cook faster but also makes the job easier. If you want to have fun you can still try that method.

Technorati Tags: mumbai style mysore masala dosa recipe, dosa varieties in mumbai, mumbai street style dosa recipes, dosa recipes, fusion dosa recipes, fusion recipes, breakfast recipes, mysore masala dosa in mumbi style